Saturday, November 20, 2010

Super Food


Spinach. When London was a baby and starting to eat solids I used this book called Super Baby Food by Ruth Yaron. This book was so informative not only in what to feed the babies and when but what nutrients are in the foods and how to form a complete vitamin/mineral/protein meal using just vegetables. In her book she described certain vegetables as super foods. These were vegetables that have so many vitamins packed into it that they, according to Yaron, make up a super food, a food we should try to eat as much as possible. To mention just a few important nutrients in spinach: Vitamins A,C,E, and K, some B vitamins, folate, folic acid, calcium and iron. Now remember these are just a few of the nutrients in spinach, there are more. So imagine eating one little spinach leaf and getting that many nutrients per leaf! I can see why she calls spinach a super food.

I mentioned before that I love pesto. Well sometimes you don't feel like spending the money, during the winter, on basil. It is expensive to buy enough to make a lot of pesto. My solution is Spinach pesto. This is a great alternative and very good for you. Instead of using all basil in your pesto you use spinach leaves and only three or four basil leaves. Here is the recipe:

2 cups packed fresh spinach
3-4 leaves basil
lemon zest, half a lemon
juice from half a lemon
1 tbsp pine nuts
1/4 cup fresh grated parmesan
1/4 cup olive oil
salt and pepper

Combine the spinach through the parmesan into a food processor and pulse until chopped. Slowly add the olive oil while processing until smooth and creamy. Taste and then add salt and pepper to taste. Done!


Now this will still have a slight basil taste and so if you wanted to fool your family into thinking it was just a regular pesto you could. Because of the lemon it will be lemony and you won't have to add much salt if any. They won't even know that they are eating spinach unless you tell them. You can serve this as a pasta sauce, over fish, chicken or with veggies. Use it as you would pesto, except remember that it does have more lemon flavor than regular so pair it wisely. This is an excellent way of getting in a lot of spinach and all the super nutrients it has. We had this last night with pasta. I added to the pasta some garlic, asparagus, chicken and tomato. In my other blog about pesto my friend Shanda commented that she froze the excess pesto in ice cube trays to use later. This is a great idea and exactly how I made my baby food. You could do this as well with your spinach pesto. Enjoy!!


Friday, November 19, 2010

Fungus!

Travel is a passion of mine probably because my parents always took us with them on their adventures. We spent summers in Europe and all over the United States. We would usually spend a good amount of time traveling because my mom had summers off. In Europe we spent most of the time in France or Spain. When I was probably around 10 we spent the summer in the Loire Valley exploring the country side. One of my favorite memories was all the cave tours that we did. Not just hieroglyphic tours, which we did in Spain, but wine, cheese and mushroom caves. The wine caves were fun, even at 10 I was allowed to try the wines and I even tried to convince my slightly drunk Mom to buy a bottle for me. (It didn't work because my Dad intervened reminding my mom that I was only 10. Shucks!) The cheese caves were my least favorite because usually it was blue cheese caves that we visited and that has never been my favorite type of cheese. Those caves usually smelled really strong. To my parents it was like heaven. To me, well let's just say I breathed through my mouth and probably exaggerated a bit about how much I disliked the smell. My most favorite types of caves on that trip were the mushroom caves. These caves were amazing. You entered the deep darkness and with the flashlights the guides had they illuminated crate after crate of exotic mushroom. Yellow, orange, brown and white. Funny shaped and button shaped. The caves did not smell, other than the normal damp cave smell but they were pretty amazing. Want to know what I loved best about those tours? Once you left the cave and went to the store they also had a restaurant where you could order the mushrooms in a dish. YUMMY! I know I say that I love a lot of things on this blog, and I guess I really do, but I love mushrooms. When Patrick and I got married he quickly learned that mushrooms and broccoli were my two favorite vegetables. (Well mushrooms are a fungus to be exact.) They are a staple in my refrigerator and I try to always include them in dishes.

Mushrooms, despite popular belief, do have nutritive value. They have potassium, fiber and B vitamins. They are quite versatile and I find them delicious. I love them prepared pretty much anyway, from raw to grilled. Last night I made them as a side dish. This side dish is so easy to make you will find yourself making them all the time.

1 tbsp olive oil
1 pound mushrooms, I like to use crimini, or baby bellas
pepper
splash of balsamic vinegar

Heat your pan over medium heat. Add the olive oil and then the mushrooms, quickly saute them to spread the oil around. Season with some pepper.


This dish takes a while because you want the mushrooms to sweat out their moisture and then become a little crispy by the time they are done. So take it slow and if they start to burn or stick to the pan lower the heat a touch. When they are about half way reduced in size add a splash or two of balsamic vinegar. This will make the mushrooms wetter again. Check on the mushrooms every few minutes so that they evenly brown. When they start to brown and some are a little crispy they are ready to enjoy as a side.


You need a lot of mushrooms because they do reduce in size when they are cooked. A pound is usually good for the three of us. We like the balsamic vinegar so I usually put a couple splashes but you be the judge and play around with it until you get the flavor you desire. You don't need to add salt because the vinegar flavor does that for you.

Enjoy!

Namaste!


Tuesday, November 16, 2010

Shrimp


I love seafood. One of my favorite shellfish to eat is Shrimp. I love shrimp and always have. I used to gobble up shrimp cocktail at any event that had them. When we first introduced London to shrimp she did not like them. I was shocked to think that MY daughter wouldn't like shrimp! So I brushed it off and decided that I would make them again anyways and give it to her and see what happened. She ate them and now she loves shrimp. Just goes to show you that you can never stop trying a food with kids. Their taste might change, the sauce might be different etc. I read this little quote in a baby book that I am reading that said, "Never let the kid pick the menu unless they are buying the food." I thought a lot about this and with my child I disagree. London is a great eater and so therefore when I ask what we should make for dinner her responses range from macaroni and cheese, homemade, to eggplant parmesan, to salmon. Her menu is wide and always tasty. For the average child however this quote would be advice I would give the parent. Don't let them decide or you will be eating chicken nuggets and fries every night of the week. (Don't get me wrong, chicken nuggets and fries are great, once in a great while.) So that is my kid food tip of the week. You pick the foods and once they are old enough they learn to eat or go hungry. I feel that this needs to be carried out at all meals, not just dinner. They will eat if they are hungry, so don't worry if they don't eat because most likely like my kid and most of my friends kids, yours most likely have never known the word hungry like the kids of Haiti know hungry.

Enough babble, on to the shrimp. Tonight's menu is Lemon Pepper Shrimp over Orzo. Shrimp is really high in cholesterol so if you are watching your cholesterol I would suggest avoiding this recipe. And the way I made it isn't the lowest in fat content. So this one is for a special occasion.

First step is I peeled, cleaned and deveined the 1/2 pound of shrimp. Then I placed in a bowl/bag with lemon juice from one lemon, 2 garlic cloves smashed, about a 1/4-1/2 cup olive oil and some fresh ground pepper. I mixed it up and placed in the fridge for a few hours. The lemon juice has a lot of acid in it so it will start to cook the shrimp. When you take the shrimp out of the fridge it will be pinkish due to that cooking. (This is how Ceviche is made in case you were wondering, lemon and/or lime juice.)

With this marinade you can do a number of things. You can put the chicken on skewers and grill them either on a grill pan or outside. You can saute them and serve over pasta or rice. I made a scampi and served over orzo. Here is how I made my scampi:

1 cup uncooked orzo
2-3 tbsp butter
2 tbsp olive oil
1 or 2 cloves or minced garlic
lemon juice
pepper
thyme

Cook your orzo according to package directions but don't add the salt or fat.
Heat your pan on med heat and melt the 1 tbsp butter. Add the shrimp and sauce until almost done and then transfer to a plate. Add the olive oil and 1 more tbsp of butter to the pan. Add minced garlic and let cook for a little but don't burn your garlic. Add the shrimp , lemon juice and pepper. (Don't add the marinade, just the shrimp.) Let simmer until shrimp are done, only about 2 more minutes.


Once your shrimp are done and the orzo has been drained, which should have been done before, add the shrimp and butter/oil to the orzo. Add a little bit of thyme and Voila! Eat and enjoy! I also served with some roasted asparagus.


Namaste!

Saturday, November 13, 2010

Full of Beans!

I am proud of being Mexican-American. It is something that has always been something to feel proud of. Despite a lot of hatred right now in the United States towards Mexicans, I never falter to tell people of my heritage. One of the most fun things that happens when one of your parents is from another country is the cooking. Passing of of family recipes that are traditional or a little different. It is something that makes my husband very happy. His favorite type of food is Mexican. (How lucky for him right?) So I make him happy sometimes and make dishes that my mom taught me how to make. She is an excellent cook so when she comes to visit we always have her make some food for us. Last time when she was here, in July, she made a big batch of Chicken Mole. (One of the family favorites.) We froze the leftovers and have slowly been eating away. Now all that is left is the sauce, and as my Dad strictly instructed me, "Do not throw that sauce away! You can use it for putting over rice or just for soaking bread, but NEVER throw it away!" Then he smiled.

One of Patrick, and now London's, favorite foods is black beans. Patrick spent some time in Guatemala and when he came back could not find black beans like they made them there. Then he met me and ate my black beans, and that's where he fell in love, among other things I hope. :) His love of black beans has been passed on to London who would and could eat nothing but black beans forever. I figure this is dangerous to pass this recipe along but I thought what they heck! Why not?! So here it goes:

1/4 chopped medium onion
olive oil, or canola
1 can of black beans
salt
1 tsp dried Mexican oregano, if you can't find it just use regular dried italian oregano

Heat your oil on medium high heat. Add onion and saute until soft. Add your can of beans. (Liquid and all.) Add salt to taste and oregano. Let simmer on low heat.


When you are just about ready to eat mash your beans with a potato masher. Serve and enjoy!


When we ate these we ate them on Tostadas but you can serve as a side, with tacos or however you want. I like to use the less sodium beans because I add my own salt to taste. You can also use dried black beans. Just soak your beans overnight and then when ready to cook drain and rinse. Add some liquid to the pan when you add your beans. Just enough to get the bottom of the pan wet and a little more. Too much will make your beans runny, so add slowly and then when you mash if you need to add a little more then do it as you mash until you reach your desired consistency.

I hope you enjoy these as much as we do.

Namaste!

Wednesday, November 10, 2010

Mediterranean Chicken


Today has been a fun day. I got to go and see my midwife and listen to the baby's heartbeat. London came with me and she got to hear it. We both smiled, sat quietly and listened. It was special beyond belief that London has been able to go to all my appointments with me an share in this amazing life event. I felt like cuddling all day under a blanket. What made it even cozier was because it rained almost all day. When dinner time came around I decided to make some chicken. Mediterranean chicken to be exact. It hit the spot, so here it is.

Chicken breasts
salt and pepper
olive oil
kalamata olives
chicken broth
8 oz diced tomatoes
minced garlic, about 2 cloves
rosemary
oregano

First before I did anything I pitted the olives. Then in a large pan I heated some olive oil over medium high heat. Season your chicken breasts with salt and pepper. Cook on each side for about 4 minutes. Take off and place to the side. Pour about 1 -2 cups broth into pan. Add olives through oregano. Scrape the pan. (I added a bit of the olive juice that came with the olives.) Lower heat and add the chicken. Cover and let simmer until the chicken is cooked through, about 15-20 minutes. Serve over rice.

This hit the spot tonight. Simple yet delicious and full of flavor. London loved it and we loved it. A special dish for a special day. Next month, we find out what the sex is of the baby. Fun times!

Namaste!

Impromptu Appetizer


I love the cookbook The Vegan Table by Colleen Patrick-Goudreau. It provided a lot of inspiration and knowledge. I am a huge supporter of the library and I love to check books out weekly. (This love is being passed down to London who now looks forward to taking her books back and getting new ones.) I find it really nice to be able to check out cookbooks. You never know if you are going to like recipes in cookbooks until you actually get to look and try some of the recipes. Checking them out gives you a chance to make and experiment with the ones you like. If you end up not being able to live without it then you can go and buy the book. In this specific cookbook I found many recipes that I loved and have now added to my menus. The one that stands out is a Panini with roasted veggies and pesto sauce. (Yummmm, I know.) The other night we were going over to my sister-in-laws house and I didn't have enough bread to make Panini for everyone so I decided to try it differently. I made them into a sort of crostini appetizer. I usually like to make my own bread when I make the Panini but this time I just used store bought French bread.

sliced bread, an Italian loaf or French bread works great, but if making smaller crostini then a Baguette would work great.
1 red bell pepper
1 yellow zucchini squash
Olive oil
salt and pepper
a bit of red onion sliced thin
1 sliced avocado
1 sliced tomato
a few tbsp balsamic vinegar
pesto, preferably homemade
sliced Muenster cheese
Parmesan cheese

Pre-heat your oven to 400. Slice your red pepper and zucchini squash and drizzle with olive oil and salt and pepper. Roast in the oven until tender and a little browned. I like to shake the pan and flip the squash after about 10 minutes.

Take out and start to assemble your crostini. Spray a baking sheet with some Pam. Place slices of bread on the pan. Take a brush and lightly brush the bread with the balsamic. Then spread some pesto. Then layer tomato, red bell pepper, squash, avocado, onion and then top with both cheeses. (You can also now grind some more fresh pepper on top.) Place back in the oven until the cheese starts to melt. Then, I turned on the broiler and watched as the cheese started to bubble and turn a little golden. You really need to just watch so you don't burn the cheese or bread. Take out and serve. I also think next time I will bake these on the pizza pan so that the bottom of the bread is crunchier. You decide and experiment at home! Enjoy!

This would be great as an appetizer, or to turn it back into a Panini just place a slice of bread on top, brush both sides of sandwich with some olive oil and place in a Panini press. London loves these and the taste of the pesto in combination with the balsamic and veggies with a little bit of cheese is just heaven to me.

Namaste!

Wednesday, November 3, 2010

Pizza Pizza


I love pizza. Especially homemade pizza. I worked a pizza place for a while during high school and loved the taste of the homemade pizza. I loved being able to design my own and put which ever toppings I like. I grew up eating pizza from this place in Christiansted that would put tomato, broccoli and mushrooms on their veggie pizza. This was my favorite combination and still is. There was a period where I would buy a frozen cheese pizza and add my toppings before baking. Patrick, London and I loved this. Then I decided that I wanted to start making anything that I could from scratch. This included the pizza dough and sauce. I found a recipe online, by Giada DeLaurentiis from Food Network, that was simple, easy to make and tasty. I then would make a simple sauce add cheese and then my toppings. It has been fun to learn what I like and what goes with what. It's also a great way to get the kids involved in dinner. London loves being able to pick what goes on the pizza. When planning dinner I ask her what she wants and she usually tells me. She picks olives a lot. (I love black olives on my pizza.) Another thing to do with the kids is to let them place the toppings onto the pizza. If you don't mind you can make it a smiley face or another pattern. They love this and most likely will definitely eat it once it is baked. Here is the dough and sauce recipe.

Dough:
3/4 cup warm water (105-115 degrees )
1 envelope active dry yeast

2 cups flour (plus some to dust the surface)
1 tsp sugar
3/4 tsp salt
3 tbsp olive oil

In your mixer place the yeast and the sugar. Add the 3/4 cup warm water. Stir a little bit and then let stand for about 5 minutes and make sure the yeast rises.

Preheat oven to 375.

Spray or brush some olive oil into a large bowl. Turn the mixer on and add the flour and salt. Slowly drizzle the olive oil until combined. Flour your surface and kneed the dough until smooth. Place dough into the bowl and cover with wrap. Place in a warm draft-free area and let rise until doubled in volume, about 1 hour. Take the dough out onto a floured surface and roll out into a circle. (You can always try with your hands just spinning it out but this takes practice.) Place on your greased and/or floured pizza pan or stone. (You can buy a pizza pan from Target pretty cheap. It's a round pan with a bunch of holes in it.)

Sauce:
olive oil
8 oz can of tomato sauce, no salt added
oregano
basil
garlic
salt and pepper

Heat some olive oil in a small sauce pan. Add the crushed garlic. ( I like to use crushed garlic to that once I put the sauce on the pizza I can take out the garlic so no one gets a huge chunk. But if you love garlic leave it in.) Add oregano and basil and let saute for a bit. Add the tomato sauce, salt and pepper to taste. Let simmer in order to let the flavors blend.

Pizza Assembly:
After your sauce is finished spread the sauce evenly on your pizza dough, that is now rolled out on the pizza pan/stone. If you are going to make a tomato basil I like to put the basil leaves on before I put the cheese.


Then add 8 oz of shredded mozzarella cheese. (You can use fresh mozzarella if you desire., then just spread out the slices around the pizza.) Then add your toppings.


Place in the oven. About half way through I slide the pizza directly onto the rack in order for the whole crust to get crunchy and to give it that pizzeria taste. I usually bake mine for about 15 minutes but I always check to make sure it's not burning. It's done when the cheese is golden. Slide back onto the pan to take out of the oven.

Take out and enjoy!!

I really like a pesto pizza. If you want to do this, instead of putting red sauce on the dough you spread homemade, or store bought, pesto all over and then cover with cheese. Sometimes after the cheese I add sliced tomatoes and then bake. So delicious. There are so many options in creating your own pizza, go crazy.

Make sure to involve your kids if you have them. You can even make this dough and cut it up once it rises to make small individual size pizzas that they can create all by themselves. (Birthday party idea! London's best friend Chloe did this for her birthday party and the kids loved it!)

Namaste!

Tuesday, November 2, 2010

Butternut Squash Pasta Sauce


Do you ever tire of the same old red pasta sauce? I do. I love pasta, in fact when we go out I almost always order a pasta dish. I always have, ask my mom. I do tend to lean towards alfredos or wine sauces and every once in a while a red sauce. I make my own pasta sauce here at home, which is a money saver and better for you. Last year I was wanting a healthier pasta sauce. Alfredos are full of fat and calories and wine sauces usually have a lot of butter, which means fat so I went in search. I had just returned from a trip home, to St. Croix, where I ate at one of my favorite restaurants, Tutto Bene. I ordered their goat cheese and butternut squash ravioli with a brown butter sauce. It was amazing. Alex and I loved it so much. (Alex being my sister and we both ordered the same thing, I know silly since we should have ordered different things and then split them, but we didn't think obviously.) The point was I got back to Boise and though I need a new pasta sauce. It was winter and I really wanted something different. I made all of London's food when she was a baby so I used to puree a lot of squash. I wondered if there was a recipe out there for a squash pasta sauce. I googled and came across this great blog that had a good recipe for butternut squash pasta sauce. http://www.thenourishinggourmet.com/2008/05/butternut-squash-pasta-sauce-2.html If you are interested you can go there. I of course changed it up a bit, because that is what I do. So if you want to see the original inspiration visit that site, look around and check out her other recipes. They are great and healthy. Here is my version:

1 Butternut squash, I choose a smaller one usually but sometimes I can the leftover sauce to put in the pantry for another nights use.
butter
brown sugar
olive oil
onion
garlic
basil
sage
chicken broth
white wine, I also think a splash of rum would taste good
salt and pepper
Parmesan cheese

Preheat oven to 375


Slice your butternut squash into half and scoop out the seeds. (I like to roast my squash for I feel it adds more depth to the flavor. It takes more time though.)
Add a bit of butter to the hollow part and place in a baking sheet. I place a little water on the sheet to help with the steam during roasting.


When almost done I sprinkle some brown sugar on the squash.
Let bake for about anywhere from 40 minutes to an hour. Check on it and test with a fork until done.

Once the squash is all done heat some olive oil in a large sauce pan. Add onion and garlic. Saute until tender. Then scoop out the squash, make sure to get the butter and sugar, and add to the sauce pan. Add basil, sage and some broth and the white wine/rum if desired. Let simmer for a bit, only to let the flavors infuse. Add salt and pepper to taste.


Your options now are to smash with a potato masher for a chunkier sauce or run through a food processor. I puree mine.


Serve over pasta, I like a to use a ziti or pene pasta but bow tie or any other smaller pasta would work great.

If your child is picky you could always put some of the roasted squash to the side and make a macaroni and cheese. Then puree the squash by itself and hide it in the mac n cheese. The color will match and it will make it creamier and thicker.

Of course I suggest that you let your child try the butternut squash pasta sauce how it's meant to be and see if they like it. I am not for hiding things in dishes but if you child is an established picky eater and you are worried about them getting their nutrients then hide it.

Hope you enjoy this. If you like butternut squash it is good.

Namaste!

Roasted Broccoli


I love broccoli! (Love might be an understatement.) It has always been my favorite vegetable, and is now London's as well. There is one exception to broccoli, frozen broccoli. It always tastes mushy and I can always tell when people and or restaurants use frozen broccoli, or any frozen vegetable for that matter. It is one of those vegetable staples that I buy every week at the store. I tried growing it here a couple years ago and got a beautiful bush but no broccoli. I asked around and found out Boise doesn't get a long enough spring and you need to baby it if you do try. (Which might explain why they don't sell it at the Farmer's Market.) I like broccoli pretty much any way it's made. I usually steam it, but only until just cooked because I like it a bit firm. Recently I have been roasting it. I love it. It is super easy and it makes the broccoli crisp and delicious.

Preheat the oven to 350-400 depending on your oven.

A head of broccoli
salt and pepper
olive oil

Wash your broccoli and cut it up. :) (Very technical term, can't you tell?)


Place in a bowl and sprinkle salt and pepper to taste and drizzle olive oil. Toss to coat evenly.


Spray a pan with pam, and evenly space out your broccoli.
Place in oven and keep an eye on it. It takes anywhere from 15-25 minutes to roast. Depending on how much and how roasted you want it. I like it when the edges are turning brown.
Take out and enjoy!


Hope you love it!
Namaste!

Monday, October 25, 2010

Ants on a Log


The title says it all. This is a classic snack that my mom used to make me and I'm sure other mom's used to make for their kids. It's a simple snack one that I was never intending to put up onto my blog but London has been asking or this snack everyday for a week. I thought if she loves it so much, maybe others need to be reminded of this great snack for kids. :)

Celery
Peanut butter
Raisins

Wash and cut celery to size

Fill with peanut butter

Top with raisins


Oh so easy but oh so tasty and good for you too. Peanut butter is one of those foods that is amazing for you. It has healthy fats and has protein in it as well. Raisins and celery are great for you and filled with fiber and natural sugars.

Advice on peanut butter. I grew up on Jiff and my husband grew up of Skippy. I have London growing up with Adams Natural.
In this day where so many foods are already prepared and packaged with extra sugar why choose a peanut butter that has extra sugar added. I advise switching to a natural peanut butter that has no added salt and no added sugar. Kids don't need their taste buds sweetened. Natural peanut butter takes a few extra steps, like stirring it because it naturally separates over time. If you use peanut butter on a regular basis you will only need to stir once though. If your child is already used to sweetened p.b. then it might take some getting used to a natural one. I totally believe that the more natural you get the better their eating habits will be and obviously the healthier they will be. (We don't need sugar in everything we eat despite what the corn industry is trying to do.)

Hope your child will enjoy!!

Namaste!

Canning Tomatoes


Yesterday, it was raining.... all day. Sometimes that can be fun, if you have a good book to curl up with for example. I did not. :( So I thought of something to do. I had about 4 tomatoes sitting on the counter, almost too ripe. I have already frozen about 2 dozen tomatoes and right now don't really want more frozen ones. I decided to put on my rain coat and go pick the last red ones off the vine and can some diced tomatoes. This process, especially the first time, seems daunting and you might even think you can't because you don't have the supplies. (I don't have the supplies.) It is actually super easy and you don't need to own "canning" supplies, other than the jars and lids. Here is my step by step process.
You will need:
1. A large soup or pasta pot, a really deep one would be ideal, mine isn't as deep as I would like but I make do.
2. A smaller sauce pot to boil at least 3 cups of water
3. Mixing bowl filled with ice water
4. Pairing knife and knife to dice
5. Tongs
6. Tomatoes
7. Lemon
8. Hot pads, towels
9. Jars with lids


First you need to wash your jars and lids in the dishwasher to make sure they are clean.

Boil water in your large pot, fill it pretty full of water, enough to cover the jars.

Place the jars and lids, not the sealing flat part, into the boiling water until ready to fill.

Boil your 3 cups of water and set your bowl of ice water to the side of the stove.

Wash your tomatoes.

Place one tomato at a time into the boiling water for about 30-45 seconds. Take out and place into ice water. Using your fingernail or a knife just scrape the skin and the rest will just peel right off. (Super easy.) Set the peeled tomato aside, in another bowl if you don't want to loose the juices. Repeat until all are done.


Empty that boiling water and replace with clean water and bring to a boil.

With your pairing knife cut out the stem and any other blemishes.


I love my plastic cutting boards that are flexible for this job just any one will do. Now you can dice your tomatoes.


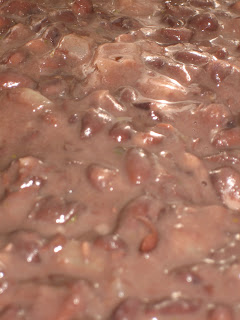
Take our a jar using your tongs and place on the stovetop or on a towel. Fill the jar with the diced tomatoes. (This is a non cook version so you get more of a diced tomato instead of a crushed tomato like other recipes out there on the internet.)


Once it is pretty full squeeze about a teaspoon of lemon juice into the jar. Fill up the jar to cover tomatoes with the fresh boiling water.

Using a paper towel clean the jar so there is no liquid where the sealer and lid are going to be. Place sealer and lid and tighten. (You might want to remember that the jar is hot so use hot pads or towels to do this.) Repeat until your jars are full.

Once they are full place the sealed jars into the large boiling water pot. Ideally they should be standing and covered, my pot is not deep enough so I lay them on their sides. I rotate half way through the boiling process to make sure they are evenly boiled, not sure if that really does anything but I have had success every time I have canned. Let them process for about 30 minutes, depends on how many jars. (You can google times if you are doing a large batch, I only did two jars.)


Take out and place on towels and leave sitting on the counter, undisturbed, for at least 24 hours. You will hear a pop sound usually within a couple hours coming from the jars. This is the sound of the lid being sucked in sealing the jars completely. If you can still push the lid in after 24 hours the process did not take. This has never happened to me so I think if it were, you would just do it again but google that to make sure. :) (There will be some separation between the water/juice and the tomatoes. This is natural and nothing to worry about.)


Then put in your pantry and enjoy!!

I don't add extra salt like some recipes call for because I will be cooking with them and will add salt to my dish. (We don't need extra sodium.) The lemon acts as a preservative and helps them to retain their color.

Questions? Just ask.

Well, it's supposed to get close to freezing here in Boise so for all my local friends out there I suggest you either cover your vines at night or pick everything. Today I will brave the cooler weather and go pick all the tomatoes, even green ones, and bring inside. Sit them on your counter and the green ones will turn red with time. Then it will be time to can again! (Or freeze.) This could make good christmas gifts for your friends. Who doesn't love a homemade gift?

Namaste!


Tuesday, October 19, 2010

This one is for Ashley :)

My great friend Ashley, with whom I grew up with, requested a soup. Since I love her and she has said she and her fiance make my dishes, how could I refuse. This is for them! (And anyone else who wants to try it.)

One of our favorite soups as a family is Black Bean Soup. It is super easy to make, filling and fun for kids to add the extras in. It is a good soup to make on a cold day and it also works in summer because it's not too heavy. Here it is! (*Note: I have a cold and forgot to take pictures until the very end so pardon me in this area.)

olive oil
diced onion
a couple minced garlic cloves
1 carrot diced
1 celery stalk diced
at least 2 cans black beans drained and rinsed
oregano
salt
dash of cumin
broth

Heat a soup pot on medium high, add olive oil. Add onion and garlic saute. Then add carrot and celery and saute some more. Add the black beans. (We use 2 cans for 3 people and Patrick and I usually have 2 helpings, so make to make more soup add more of everything.) Add oregano and salt to taste. You can also add a dash of cumin. (I think cumin has a tendency to over power so I only add a little.) Add broth, enough to cover. The more broth you add the soupier it will be, we like it thick so I add just enough to cover. I also tend to use veggie broth but a beef broth would make it rich as well. Bring to a simmer and let simmer until carrots and celery are tender. I tend to make an hour in advance and just let it simmer until it's time to blend. When it's time for dinner, if you had a hand held immersion blender like the one I am coveting use it to blend everything together. If you don't have one, then use your food processor and in small batches blend the soup.


You want it to be creamy. (A few pieces of carrot here and there are fine.) Serve!

Toppings!!
This is fun and you can get creative. Here are some suggestions:
Avocado: I almost always have avocado on hand so I dice it up and put in a bowl at the table. (Of course last night I did not.)
Cilantro
Shredded cheese
Light sour cream, or the mexican Crema
Tortilla chips: I like to crunch them on top


I hope you enjoy this as much as we do. London really eats this up and it's super fun to let the kids decide what to add in. (Although she usually gets carried away with the sour cream.) She likes to have that option. You can also use the tortilla chips to dip with. (And if you wanted to make it even thicker add less broth and you have a yummy black bean dip!)

Namaste!

Thursday, October 7, 2010

Quinoa Salad

Quinoa


Quinoa is one of those really yummy and nutritious grains, although it's not really a grain but a seed, that we have available but simply don't use very often. It hails from Peru high up in the mountains. People up there found that it grew really well in the high altitude climate and not only provided fiber but a complete protein. What a cool seed. I like quinoa for it's texture and ease of cooking. It is easily available thanks to some guys from Colorado that brought it back from Sud America with them and attempted to grow it in the high altitude of Denver, I believe. Now I buy it in the bulk section at WinCo, a local grocery store but I am sure it is available at other stores as well here in the valley and around the nation. I made a yummy salad, served either hot or cold. I forgot to take a picture of the final product because I was soooo hungry by the time it was done I just ate most of it. I did manage to snap a photo of the leftovers in the leftover container... not too great. Sorry. But you will get the idea. I took the idea for this recipe from a Cooking Light recipe for a corn salad. I just added quinoa to make it more of a complete meal. It is a very light meal though, so you can always use it as a side dish.

1 cup Quinoa
1 1/2 cups water
diced tomato
diced new potatoes, about 4, boiled and cooled
corn
green onion

Bring water to a boil and add quinoa. Cover, lower heat and let simmer until water is absorbed. If you want the salad cool then cool it down.

Add the tomato through the onion to the quinoa.

Vinaigrette
1 tbsp dijon mustard
3 tbsp red wine or white wine vinegar
salt and pepper
3tbsp olive oil
lemon juice

combine the mustard, vinegar and s&p. Slowly add the olive oil as you whisk. Then whisk in the lemon juice to taste.

Pour this vinaigrette over the quinoa salad for a yummy flavor.


Sometimes I make the quinoa and add in cucumber, tomato, feta and green onion and then add a similar vinaigrette. That one is super yummy as well.

Hope you enjoy this salad!

Today I went out to my garden, which I haven't done for a bit because the tomatoes just didn't look quite red enough from the window and it's been raining, not as much as in St. Croix though. I went out and turned around and came back in for my biggest mixing bowl. Went out and harvested red tomatoes galore. I will definetly have some to freeze for winter use. :)


Namaste!


Friday, September 24, 2010

Pesto


I told you I was going to make pesto soon. It made me really want pesto. So instead of doing a huge batch right now I am just making some for tonight to cover my salmon in while baking. Can you say yummy? Here is my pesto recipe, I will not use measurements for this one!

a bunch of basil, it depends on how much you are making
pine nuts
garlic
parmesan cheese
lemon zest
olive oil


Put the first four ingredients into a food processor and start to process. While processing slowly dribble some olive oil into the bowl. You might have to stop and scrape the sides down a couple times.

Hints: Always wash your lemon before zesting. I used a little more cheese than normal so the color is not as green. I also like the lemon zest because especially on fish I feel it adds a little something. You do not need to add any salt because of the cheese and the lemon. If you ever want to have a bit more salt taste to a dish, if it won't ruin the flavor, add some lemon zest. This won't give you the sodium but will bring out every single flavor more intensely.

Substitute: If you don't have much basil but have a bunch of spinach on hand you can use the spinach and whatever basil you do have. The basil has such an intense flavor that it will come out but your batch will be bigger. It also adds a lot of calcium from the spinach, one of the super foods. (If your kids or husband don't like spinach this will hide it from them.)

I coated my salmon with my pesto and baked at 350 for about 25 minutes. The time all depends on how big of a filet you have, just stick a fork into the thickest part and if it flakes then it's done. Mine was probably big enough for four adults so we had leftovers.


If you are going to buy salmon the best and most ecologically friendly salmon you can buy is wild caught Alaskan salmon. Farm raised might taste pretty good and look the same but there are many things under the surface that are different.
1. They are now feeding salmon a corn meal just like they have made cows eat corn.
2. Color added. Have you ever wondered how they add that color? Well, I know and will share. When people started to farm salmon they were putting them in large holding tanks and feeding them fish meal. Salmon in the wild eat other fish and plankton. The plankton eats sea vegetables, like algae. This algae has beta carotene in it. In turn, when the salmon eat the plankton they are eating beta carotene which turns their flesh that "salmon" color we know and love. Farmed fish do not get the beta carotene from the fish meal they are fed and so the farmers were finding that when they killed their salmon and cut them open they were a white color. They knew that buyers were not going to buy white salmon so they thought of something. They approached pharmaceutical companies and made a deal for them to have their own color of pink for their fish. They create a dye which is put into their fish meal which then dyes their flesh that pink color we expect. So now you know what "color added" means. (Pretty crazy if you ask me.) (Oh and thanks to Colleen Patrick-Goudreau for that information which I heard on her podcast.)

So now you know and can make a little more informed choice about the type of salmon to buy and eat. Hope you enjoy the pesto recipe which is also great as a dip for veggies and in one of my favorite pasta dishes. (London likes to lick the spoon and bowl after I make it.)

Namaste!


Thursday, September 23, 2010

It's been a while


I know it's been a while. I am sorry. I have not been feeling that great and so have not had a lot of motivation to be cooking. I am starting to feel better and actually made a whole dinner last night. It felt good. While I was cooking I thought of a great topic. Tomatoes! I love garden fresh tomatoes. I have been getting a lot recently and have been making a lot of salads. The most basic and fresh salad that I love is a tomato and cucumber salad. This picture is the salad I made right out of my garden.

Slice up your tomato
Slice up your cucumber
Layer them around a plate. Drizzle on some olive oil, sprinkle on some salt and pepper and chop up some basil and sprinkle. The most yummy garden fresh salad. London eats this up and so do we.
You can vary this with some mozzarella slices, or feta chunks if you want too.
(I guess in this picture I did not sprinkle basil, oh well.)


Last night though I made some chicken and for the sauce I used a fresh tomato. It made me remember a little tip that got passed on to me from a friend about preserving tomatoes. Last year I had tons of tomatoes. I decided I was going to can some diced ones for winter use. I was talking with a friend who said instead of canning she freezes her tomatoes. I did can one large jar or tomatoes and then decided to freeze the rest, since it sounded much easier. WOW, it's exactly the same. We all should know that fresh fruits and veggies once frozen will not have the same texture as the non frozen variety. (One reason I dislike frozen veggies, they are too mushy.) So here is what I do.
I freeze whole tomatoes in freezer bags when they are at peak of ripeness. (You can halve them if you like, but don't dice.) When you need a can of diced tomatoes take one tomato out of the freezer, no need to thaw. Run it under luke warm water and rub the skin, it should peel right off. Then dice it on the cutting board and add it to the dish to cook. It will look, feel and taste like a diced can tomato only fresher because you grew it! It was such a great tip that for a whole year I did not need to buy canned tomatoes.

Another thing that got me thinking this week was my basil. It's starting to get cooler here and it's not as big of a plant as it was in the heat of summer. I really love having fresh basil on hand but I don't want it to go to waste. Sure, I could bring it inside, but in the past I've done that and the soil was hiding some unwanted bugs that hatched inside where it was warm and I had little bugs flying around my house. (My cat loved it, I did not.) My plan is to make a large batch of pesto and to freeze it. When I need some pesto I will just take a spoon out and scoop, or dig, some out. The color won't be as vibrant green but it should work. You can also freeze the individual leaves to use in sauces but like before, not good for garnish because the color changes to a dark green color when frozen.

Well when I get back into the swing of cooking more I will post some more blogs with recipes that I love. Here's to feeling better!

Namaste!

Friday, September 10, 2010

Canning

I love to can. (I know, how old am I?!) But seriously I do. Mostly I make my own jam, but last summer I canned my excess tomatoes from the garden and I also canned a pasta sauce made of butternut squash. This summer I went strawberry picking with my best friend Marisa who was visiting us at the time.


We picked so many we decided to make jam. What I love about canning is that you control what goes into the preserve. Take a jar of regular strawberry preserves off the shelf at the grocery store and I bet you'll find high fructose corn syrup and citric acid, both corn derived. I love corn, just not in everything I eat. This is what has happened, corn is now in everything we eat if we eat off of the shelves of the grocery store. (I highly recommend reading Omnivore's Dilemma and watching Food Inc.) When London was little I would buy canned fruit from the store instead of steaming it myself, which I might try in the future if another one comes along. The hard thing about this was that almost all the fruit was canned in HFCS or a light syrup, which is sugar. Why would you add unnecessary sugar to an already naturally sweet product? American's tongues have lost taste and need things super sweet now and expect all fruit to be sweet to the extreme instead of just tasting the fruit for what it is. I always tried to buy fruit canned in water, which is hard to find, or light syrup which I would then wash off before feeding it to her.

I digress, back to canning. You can control what goes into each and every can when you do it yourself and you really don't need the special equipment that the canning industry recommends. I use my big soup pot and tongs. When I made the strawberry jam I bought some pectin and the recipe inside called for 7 cups of strawberries and 5 cups of sugar. Are you kidding me?! I cut the sugar down to 2 cups and it is perfectly sweet. When canning fruits I don't think you should add any sugar let alone a syrup. Just can them in water with maybe, depending on the fruit, a squirt of lemon juice to help with discoloration.


We have an apricot tree and some plum trees in our yard. Last year I got a lot of apricots and make jam out of them but this year we got two apricots due to a weird spring and the birds got them before me, sad face. The plums however were overflowing. London and I went out and picked a whole bunch and then made jam. So now I have cans of strawberry and plum jam in my pantry. I am so happy knowing that my jam is HFCS free and only has a little sugar in it. I know that if I canned whole fruits I would be very happy knowing that my canned fruit was packed in water and not in syrup. So if you are embarking on a canning experience please remember to not can with syrup. Why add the extra sugar, and a highly refined sugar at that, to a perfectly delicious natural snack?

Namaste!

Thursday, September 9, 2010

Root Vegetable Soup


I promised you all that I was going to try to recreate the soup I had in the Netherlands. It was so yummy and satisfying on that cold rainy day. Today was not a rainy day, but it was overcast and cool. (I am so sad that it seems that summer is almost gone. I am not ready for that.) Today seemed like a good day to make soup.

I know that I made it a little differently. I added potatoes and didn't put as much broth into the soup. Mine had a little more substance per bite than the other soup, but it still turned out great. I also substituted chard for the kale, since my garden is over flowing with the chard right now. I bought this broth in Germany that I used for the soup.


It is a clear broth but very tasty. The vegetable broth I buy here has a big carrot taste and this one doesn't. I might look in the soup aisle to see if I can find it here.

1 carrot, diced small
1 leek, chopped
1 small potato, diced small
1/4 of your standard grocery store red bell pepper (I used a really small one from my garden.), diced really small
3 chard leaves, medium size ones, chopped small
1 tbsp olive oil
5 cups water
3 tsp powder of broth
1/4 pasta


Heat the olive oil in the pot on med-high heat. Add the leek and bell pepper and saute until soft. Once soft add the carrot and potato, maybe add a splash of water to help soften up a bit. Then add the all the water, broth powder, and chard. Bring to a boil and then lower to a simmer. Simmer until root vegetables are soft. 5 minutes before serving add the pasta. Now I used the alphabet pasta because I let London choose. It makes eating a little more fun. In the restaurant it was the normal angel hair pasta bits. After eating both, it really doesn't matter. :) So good. London and I ate it up, Patrick wasn't home for it. (Don't worry, I'll make it again for him!)


The pasta comes in little bags and I always find it in the Mexican aisle, they also have little stars that are super cute.


That's another thing about kids. It doesn't hurt to make it fun for them. The whole option of alphabet pasta vs. regular pasta was left up to her, and why not give them a little choice. Now when it comes to giving them choices, don't become a short order cook. They need to eat what you eat and what you make. There are nights when London decides to push her luck and says she won't eat. I don't then make her something else, I say "This is it. If you don't eat this you don't eat anything." Some nights her plate stays on the table until close to bed time and then she eats it. But I never make her something else. This doesn't happen very often but it does happen and that is how we deal with it. Also if she doesn't eat a lot I leave her plate on the table until she goes to bed, because many a night she comes back and snacks while she's playing before bed. That way I know that if she asks for something to eat 10 minutes after I clean up I can point to the table and tell her to eat her dinner. It works.

Enjoy the soup!

Namaste!