Sunday, February 6, 2011

Homemade Pop Tarts


About a couple weeks ago I saw on Facebook someone saying that they made homemade pop tarts. I immediately followed the link on their site and saw the recipe. I thought about for a while and being in St. Croix I decided to wait until I was back in Boise. I'm back and so yesterday London and I decided that it would be a good idea to try them out. I, like most people, ate a lot of pop tarts in college because they were the most bang for the buck in the vending machines that lined the halls on campus. I knew they were horrible for me but since I was dancing all the time I figured that the exercise would balance out the harm. Well now that I have London I have not purchased pop tarts in years. There are a few foods that I will not buy and pop tarts are one of those foods. They are full of preservatives and artificial colors and not to mention high fructose corn syrup. No real fruit and who knows how long their shelf life is. London didn't even know what they were, until yesterday when we made them.

I can tell you this, they are time consuming. They are not difficult but time consuming for sure. Instead of making them rectangles we made them half circles. This time I opted for chocolate filling. I chopped up some dark chocolate, mixed in some sugar, cinnamon, and a dash of nutmeg. Next time I will try a jam filling. It was so much fun and now London will only know a pop tart to be my pop tarts. Here is the website that I got the recipe from. This site has a lot of really yummy recipes on it that I am dying to try. I will do and then let you know as I do.

http://smittenkitchen.com/2010/04/homemade-pop-tarts/

Here are the pictures of our experience. London loved helping and then she loved eating. We also did the recommendation of King Arthurs Flour of making the scraps into a tasty treat. It was a delicious kind of day yesterday.


Namaste!


Thursday, February 3, 2011

Healthy Snack


It's been a long long time. Sorry to all those that follow and like my recipes. My Dad passed away unexpectedly the 28th of November so my mind has been elsewhere. I have also been back home with my family for a while and just now got back to Boise. While I was away I ate so many yummy comfort foods and loved them all.

One of my favorite snacks, and London's, is yogurt. I go through phases with yogurt and sometimes don't eat it for months but right now I'm on a kick. I love greek honey yogurt. I love the brand Zoi, which I can only find in one store here in Boise. It's so thick and creamy.


For a snack I scoop some into a bowl then top with blueberries and drizzle with a little extra honey. I love this snack and don't feel bad when I eat it. :)


Greek yogurt has more protein in it that regular yogurt, which right now since I am 27 weeks pregnant, is very important. The blueberries provide antioxidants and that tiny burst of flavor. (The extra drizzle of honey is just because I love sweet things!) Hope you enjoy this super easy and yummy snack, good for all ages.

Saturday, November 20, 2010

Super Food


Spinach. When London was a baby and starting to eat solids I used this book called Super Baby Food by Ruth Yaron. This book was so informative not only in what to feed the babies and when but what nutrients are in the foods and how to form a complete vitamin/mineral/protein meal using just vegetables. In her book she described certain vegetables as super foods. These were vegetables that have so many vitamins packed into it that they, according to Yaron, make up a super food, a food we should try to eat as much as possible. To mention just a few important nutrients in spinach: Vitamins A,C,E, and K, some B vitamins, folate, folic acid, calcium and iron. Now remember these are just a few of the nutrients in spinach, there are more. So imagine eating one little spinach leaf and getting that many nutrients per leaf! I can see why she calls spinach a super food.

I mentioned before that I love pesto. Well sometimes you don't feel like spending the money, during the winter, on basil. It is expensive to buy enough to make a lot of pesto. My solution is Spinach pesto. This is a great alternative and very good for you. Instead of using all basil in your pesto you use spinach leaves and only three or four basil leaves. Here is the recipe:

2 cups packed fresh spinach
3-4 leaves basil
lemon zest, half a lemon
juice from half a lemon
1 tbsp pine nuts
1/4 cup fresh grated parmesan
1/4 cup olive oil
salt and pepper

Combine the spinach through the parmesan into a food processor and pulse until chopped. Slowly add the olive oil while processing until smooth and creamy. Taste and then add salt and pepper to taste. Done!


Now this will still have a slight basil taste and so if you wanted to fool your family into thinking it was just a regular pesto you could. Because of the lemon it will be lemony and you won't have to add much salt if any. They won't even know that they are eating spinach unless you tell them. You can serve this as a pasta sauce, over fish, chicken or with veggies. Use it as you would pesto, except remember that it does have more lemon flavor than regular so pair it wisely. This is an excellent way of getting in a lot of spinach and all the super nutrients it has. We had this last night with pasta. I added to the pasta some garlic, asparagus, chicken and tomato. In my other blog about pesto my friend Shanda commented that she froze the excess pesto in ice cube trays to use later. This is a great idea and exactly how I made my baby food. You could do this as well with your spinach pesto. Enjoy!!


Friday, November 19, 2010

Fungus!

Travel is a passion of mine probably because my parents always took us with them on their adventures. We spent summers in Europe and all over the United States. We would usually spend a good amount of time traveling because my mom had summers off. In Europe we spent most of the time in France or Spain. When I was probably around 10 we spent the summer in the Loire Valley exploring the country side. One of my favorite memories was all the cave tours that we did. Not just hieroglyphic tours, which we did in Spain, but wine, cheese and mushroom caves. The wine caves were fun, even at 10 I was allowed to try the wines and I even tried to convince my slightly drunk Mom to buy a bottle for me. (It didn't work because my Dad intervened reminding my mom that I was only 10. Shucks!) The cheese caves were my least favorite because usually it was blue cheese caves that we visited and that has never been my favorite type of cheese. Those caves usually smelled really strong. To my parents it was like heaven. To me, well let's just say I breathed through my mouth and probably exaggerated a bit about how much I disliked the smell. My most favorite types of caves on that trip were the mushroom caves. These caves were amazing. You entered the deep darkness and with the flashlights the guides had they illuminated crate after crate of exotic mushroom. Yellow, orange, brown and white. Funny shaped and button shaped. The caves did not smell, other than the normal damp cave smell but they were pretty amazing. Want to know what I loved best about those tours? Once you left the cave and went to the store they also had a restaurant where you could order the mushrooms in a dish. YUMMY! I know I say that I love a lot of things on this blog, and I guess I really do, but I love mushrooms. When Patrick and I got married he quickly learned that mushrooms and broccoli were my two favorite vegetables. (Well mushrooms are a fungus to be exact.) They are a staple in my refrigerator and I try to always include them in dishes.

Mushrooms, despite popular belief, do have nutritive value. They have potassium, fiber and B vitamins. They are quite versatile and I find them delicious. I love them prepared pretty much anyway, from raw to grilled. Last night I made them as a side dish. This side dish is so easy to make you will find yourself making them all the time.

1 tbsp olive oil
1 pound mushrooms, I like to use crimini, or baby bellas
pepper
splash of balsamic vinegar

Heat your pan over medium heat. Add the olive oil and then the mushrooms, quickly saute them to spread the oil around. Season with some pepper.


This dish takes a while because you want the mushrooms to sweat out their moisture and then become a little crispy by the time they are done. So take it slow and if they start to burn or stick to the pan lower the heat a touch. When they are about half way reduced in size add a splash or two of balsamic vinegar. This will make the mushrooms wetter again. Check on the mushrooms every few minutes so that they evenly brown. When they start to brown and some are a little crispy they are ready to enjoy as a side.


You need a lot of mushrooms because they do reduce in size when they are cooked. A pound is usually good for the three of us. We like the balsamic vinegar so I usually put a couple splashes but you be the judge and play around with it until you get the flavor you desire. You don't need to add salt because the vinegar flavor does that for you.

Enjoy!

Namaste!


Tuesday, November 16, 2010

Shrimp


I love seafood. One of my favorite shellfish to eat is Shrimp. I love shrimp and always have. I used to gobble up shrimp cocktail at any event that had them. When we first introduced London to shrimp she did not like them. I was shocked to think that MY daughter wouldn't like shrimp! So I brushed it off and decided that I would make them again anyways and give it to her and see what happened. She ate them and now she loves shrimp. Just goes to show you that you can never stop trying a food with kids. Their taste might change, the sauce might be different etc. I read this little quote in a baby book that I am reading that said, "Never let the kid pick the menu unless they are buying the food." I thought a lot about this and with my child I disagree. London is a great eater and so therefore when I ask what we should make for dinner her responses range from macaroni and cheese, homemade, to eggplant parmesan, to salmon. Her menu is wide and always tasty. For the average child however this quote would be advice I would give the parent. Don't let them decide or you will be eating chicken nuggets and fries every night of the week. (Don't get me wrong, chicken nuggets and fries are great, once in a great while.) So that is my kid food tip of the week. You pick the foods and once they are old enough they learn to eat or go hungry. I feel that this needs to be carried out at all meals, not just dinner. They will eat if they are hungry, so don't worry if they don't eat because most likely like my kid and most of my friends kids, yours most likely have never known the word hungry like the kids of Haiti know hungry.

Enough babble, on to the shrimp. Tonight's menu is Lemon Pepper Shrimp over Orzo. Shrimp is really high in cholesterol so if you are watching your cholesterol I would suggest avoiding this recipe. And the way I made it isn't the lowest in fat content. So this one is for a special occasion.

First step is I peeled, cleaned and deveined the 1/2 pound of shrimp. Then I placed in a bowl/bag with lemon juice from one lemon, 2 garlic cloves smashed, about a 1/4-1/2 cup olive oil and some fresh ground pepper. I mixed it up and placed in the fridge for a few hours. The lemon juice has a lot of acid in it so it will start to cook the shrimp. When you take the shrimp out of the fridge it will be pinkish due to that cooking. (This is how Ceviche is made in case you were wondering, lemon and/or lime juice.)

With this marinade you can do a number of things. You can put the chicken on skewers and grill them either on a grill pan or outside. You can saute them and serve over pasta or rice. I made a scampi and served over orzo. Here is how I made my scampi:

1 cup uncooked orzo
2-3 tbsp butter
2 tbsp olive oil
1 or 2 cloves or minced garlic
lemon juice
pepper
thyme

Cook your orzo according to package directions but don't add the salt or fat.
Heat your pan on med heat and melt the 1 tbsp butter. Add the shrimp and sauce until almost done and then transfer to a plate. Add the olive oil and 1 more tbsp of butter to the pan. Add minced garlic and let cook for a little but don't burn your garlic. Add the shrimp , lemon juice and pepper. (Don't add the marinade, just the shrimp.) Let simmer until shrimp are done, only about 2 more minutes.


Once your shrimp are done and the orzo has been drained, which should have been done before, add the shrimp and butter/oil to the orzo. Add a little bit of thyme and Voila! Eat and enjoy! I also served with some roasted asparagus.


Namaste!

Saturday, November 13, 2010

Full of Beans!

I am proud of being Mexican-American. It is something that has always been something to feel proud of. Despite a lot of hatred right now in the United States towards Mexicans, I never falter to tell people of my heritage. One of the most fun things that happens when one of your parents is from another country is the cooking. Passing of of family recipes that are traditional or a little different. It is something that makes my husband very happy. His favorite type of food is Mexican. (How lucky for him right?) So I make him happy sometimes and make dishes that my mom taught me how to make. She is an excellent cook so when she comes to visit we always have her make some food for us. Last time when she was here, in July, she made a big batch of Chicken Mole. (One of the family favorites.) We froze the leftovers and have slowly been eating away. Now all that is left is the sauce, and as my Dad strictly instructed me, "Do not throw that sauce away! You can use it for putting over rice or just for soaking bread, but NEVER throw it away!" Then he smiled.

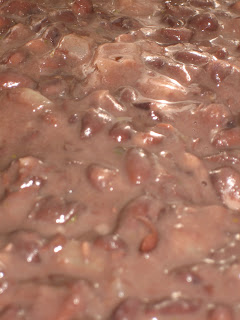
One of Patrick, and now London's, favorite foods is black beans. Patrick spent some time in Guatemala and when he came back could not find black beans like they made them there. Then he met me and ate my black beans, and that's where he fell in love, among other things I hope. :) His love of black beans has been passed on to London who would and could eat nothing but black beans forever. I figure this is dangerous to pass this recipe along but I thought what they heck! Why not?! So here it goes:

1/4 chopped medium onion
olive oil, or canola
1 can of black beans
salt
1 tsp dried Mexican oregano, if you can't find it just use regular dried italian oregano

Heat your oil on medium high heat. Add onion and saute until soft. Add your can of beans. (Liquid and all.) Add salt to taste and oregano. Let simmer on low heat.


When you are just about ready to eat mash your beans with a potato masher. Serve and enjoy!


When we ate these we ate them on Tostadas but you can serve as a side, with tacos or however you want. I like to use the less sodium beans because I add my own salt to taste. You can also use dried black beans. Just soak your beans overnight and then when ready to cook drain and rinse. Add some liquid to the pan when you add your beans. Just enough to get the bottom of the pan wet and a little more. Too much will make your beans runny, so add slowly and then when you mash if you need to add a little more then do it as you mash until you reach your desired consistency.

I hope you enjoy these as much as we do.

Namaste!

Wednesday, November 10, 2010

Mediterranean Chicken


Today has been a fun day. I got to go and see my midwife and listen to the baby's heartbeat. London came with me and she got to hear it. We both smiled, sat quietly and listened. It was special beyond belief that London has been able to go to all my appointments with me an share in this amazing life event. I felt like cuddling all day under a blanket. What made it even cozier was because it rained almost all day. When dinner time came around I decided to make some chicken. Mediterranean chicken to be exact. It hit the spot, so here it is.

Chicken breasts
salt and pepper
olive oil
kalamata olives
chicken broth
8 oz diced tomatoes
minced garlic, about 2 cloves
rosemary
oregano

First before I did anything I pitted the olives. Then in a large pan I heated some olive oil over medium high heat. Season your chicken breasts with salt and pepper. Cook on each side for about 4 minutes. Take off and place to the side. Pour about 1 -2 cups broth into pan. Add olives through oregano. Scrape the pan. (I added a bit of the olive juice that came with the olives.) Lower heat and add the chicken. Cover and let simmer until the chicken is cooked through, about 15-20 minutes. Serve over rice.

This hit the spot tonight. Simple yet delicious and full of flavor. London loved it and we loved it. A special dish for a special day. Next month, we find out what the sex is of the baby. Fun times!

Namaste!