Thursday, March 7, 2013

Quinoa Salad

I have to let you all know about my progress.  I made a promise, a new years resolution of sorts, to eat vegetarian 6 days out of the week for one month.  I would like to let you know that we have now made it through the first week of March keeping this resolution!  Yeah us!  Or more like me since everyone else just eats what I make.  At first I have to tell you, it took some retraining on my part.  I really had think of how to make the meals filling and with enough protein to satisfy the needs of my growing children.  It was hard.  We ate a lot of vegetarian fajitas and mexican fare with no meat.  (This worked well for Patrick since he is in love with anything Mexican.)  I needed more so I started to get creative and I am finally feeling a love for this.  I am finding it easier to create meals and I really don't need to worry about defrosting anything ahead of time, which is AWESOME!  The only time we eat meat is if we eat out and order something with meat, or on Sundays.  Sundays my husbands family gets together for a big potluck family dinner.  His family includes Grandma, Parents, Aunts, Uncles, Cousins and siblings.  They are all big meat eaters so it is hard to avoid it on Sundays.  I always bring meatless but I do usually eat a bit.  Lucca and London always want something with meat and that is okay.  However, I am so proud of myself and this family for sticking to my resolution and going strong!

Pinterest is a great place to get inspiration for all things, including cooking.  I came across this Quinoa Superfood Salad by Iowa Girl Eats last week and thought it looked super yummy.  I went to the store and couldn't find pomegranates so I thought I would tweak it a bit.  Here is what I came up with last night.


Quinoa Salad

1 cup dry quinoa
1/2 cup lentils
1/8 cup red onion
1 avocado, diced
1 orange, peeled and diced
2 tomatoes, diced
1 cup corn
1 cup rinsed black beans
1/4 cup cilantro, chopped

Lemon Vinaigrette

1/4 cup lemon juice
6 tablespoons olive oil
salt and pepper
1 clove of garlic, use a micro plane or finely dice

Cook the quinoa and lentils together.  I used about 1 1/2 cups of water and you might want to watch it to add a little more water if the lentils seem to hard.  Let cool.
Cut up everything else.

Assembly the vinaigrette.  Add the lemon juice, salt, pepper and garlic to a small glass jar or bowl.  Either add the olive oil and put the lid on and shake it up or slowly add the oil to the bowl as you whisk.  This helps to emulsify the oil and the juice.  Either way works, I used a glass jar that I have a lid to and just shook it up.

I then added the quinoa and lentils to the cut up "extras".  I didn't use all the quinoa.  I was probably left over with 1/2 cup which I threw some on a salad today for lunch.    Mix it up and slowly add the vinaigrette.  Add a little bit at a time and then mix and taste.   I am glad I didn't add it all because it would have been way over powering to me if I had.  Bonus, I had some to put on the salad today!  Enjoy!!

Next time I will probably add less onions, as they aways tend to overpower and the kids didn't like the raw onions in the salad.  I liked the addition of lentils.  Lentils are a super super super food.  They have so much protein and a lot of iron and they are super cheap and easy to cook.  Quinoa as many of you know is also very high in protein.  This is definitely going to be a stable, especially over summer.  Patrick made the comment that it would be good as a sort of dip with chips.  Yumm.

Namaste!
Natasha

Shredded Sauteed Zucchini

I am not always a big fan of zucchini.  I tolerate it most of the time.  I always grow it, or a yellow squash, every summer because it grows easily and it makes for good sides and additions to almost everything.  But this dish, I loved.  It had such a good taste and was pretty simple to make with a little thought and preparation ahead of time.


Shredded Sauteed Zucchini

5-6 zucchini
onion
salt
pepper
olive oil

About an hour ahead of dinner shred your zucchini, just the outer part, discard the seeds in the middle or save to use in a pasta sauce.  Place the zucchini in a colander and salt it.  Just sprinkle about a teaspoon or two over the zucchini and let sit.  This will help to pull the moisture out of the zucchini so they will brown up a bit more when cooking and won't be as soggy.  Let it sit for 15 minutes in the sink or over a bowl.  (The water that drips will be a vibrant green and if it weren't for the added salt would be really good in a smoothie or something.)  After 15 minutes place the zucchini in a towel and squeeze the zucchini shreds to get even more liquid out.  Put back into the colander and fluff it up a bit.

Heat your pan on medium high with a little olive oil.  Add the onion, maybe two tablespoons or so, and soften.  Add the salt and pepper and zucchini.  Sauté until golden brown.

Super easy and really delicious.  Lucca and London couldn't get enough of this.  We served it over rice with roasted carrots.  Yummy!

Namaste
Natasha

Tuesday, February 5, 2013

Pesto Soup and Pickles

I made a soup a couple weeks ago that London loved so I decided to make it again and this time document with pictures and add it to my vegetarian dinner blog entries.  It is a great summer soup but I don't like to eat a lot of soup in the summer.  You can use all your frozen vegetables from the summer in it or use fresh.  (I used fresh except the tomatoes which I used frozen ones from the garden.)  This is a pretty great soup that you can add any veggies that you like or have on hand and it works out perfectly.  I made it differently both times and both times the kids liked it.  (We did too.)


Pesto Vegetable Soup

olive oil
1 1/2 quarts vegetable broth
1/2 small onion chopped
1 clove garlic diced
1 zucchini sliced or halved and sliced
1 yellow squash sliced or halved and sliced
2 medium carrots
1 medium parsnip
1 can of cannelini beans
a bunch of green beens cut to about an inch in length
handful of mushrooms, quartered
half a can of corn, no salt added
2 tablespoons of pesto - homemade or bought ( I tend to add a bit more because we are pesto lovers.)
salt and pepper to taste

*Last time I made this soup I added broccoli and kale and I didn't use as much zucchini and I didn't have the parsnip.  It really is a flexible soup.

Heat your olive oil on medium high heat.  Add onion and garlic and saute for a bit.  Add carrots and parsnips and saute.  Add broth and let simmer until carrots are tender.  Add the rest of your vegetables and beans.  (If adding kale or spinach add that later so it stays together.)  Simmer.  Before serving add the pesto and salt and pepper to taste.  Once dished up and I like to grate some parmesan on top and slice up some yummy crusty bread.  Easy and full of flavor!


I finally found a brand of pickles that does NOT have added color.  I stopped buying pickles because of the added artificial colors that more brands add into their jars to make the pickles look more green.  Fresh pickled cucumbers are not bright green, they are dull colored and so much better for you.  There are some links to artificial colors and ADD and ADHD and hyperactivity in kids.  (Google it for yourself.)  I like to try and avoid artificial colors, especially in my cooking.  Here is my plug for pickles.   Farmer's Garden by Vlasic.  The only iffy ingredient is Calcium chloride.  Which is used to give the salty taste without adding the extra sodium.  This brand of pickles, I have bought a couple different varieties now, always comes with carrots and peppers on the bottom, a delicious treat.  I hope you enjoy the soup and if you buy these pickles the pickles too!


Namaste!
Natasha


Tuesday, January 29, 2013

Cooking with Toddlers - Spanakopita


I grew up with a Mom who made a lot of different types of food.  She cooked her own style but always incorporated other cultures into our food.  My sister and I grew up eating all different foods and loving almost all types, ironically except a lot of typical American foods like Jello salads and heavy mayonnaise based dishes. (And she never made meatloaf, although I like it.)  Needless to say we ate a lot of variety.  One of my favorite dishes that she made was Spanakopita.  (I have so many favorites though really sometimes I say that and then I start thinking of all my favorites and the list is SOOO long.)  I love phyllo dough and when she made it I loved to eat the top layers off of the dish when she wasn't looking, while it was sitting and cooling.  (Truth be told, I think all of us did heehee. ) *As I was washing dishes after the spanakopita came out of the oven, I turn around to see the tradition continue. Patrick was holding Lucca over the dish and they were sneaking bits of yummy brown phyllo dough!*  Another reason I loved eating this dish was that it was fun to make with her.  She always let me help and helping made me super excited to eat it.  This is key when getting your kids to eat foods.  If they help you make it and are involved in the process, especially tasting process, they are more likely to eat the finished product.  I have found this true with most kids.  Spanakopita is a process, especially if you make the little appetizer triangles.  Which is probably why my Mom never did.  We always made the 9 x 13 pan.  I have made the triangles before and they are very labor intensive and time consuming, not something I have a lot of with a toddler running around.  So today while London was at school we cooked.  As stated in my previous post Lucca and London both love helping me make dough for bread and everything else that allows them to sit on the counter and help.  Lucca often will run to the pantry and take out my Kitchen Aid mixing bowl and bring it to me where ever I may be in the house.  He is very sad when I say no.  Very sad.  Cry and stomp sad.

Tips for cooking with Toddlers and Pre-Schoolers (and Kindergartners):

1. It will be messier.  They will spill and sometimes accidentally throw things.  Be prepared to clean up more flour than normal and be prepared to possibly change clothes after.
2.  They will stick their hands in the mixer, even if it is mixing so be watchful.  Sometimes they will put a measuring spoon into the mixer too.  Stand guard.
3.  They like to watch the mixer up close, sometimes this leads to sneezing into the mixer.  Be okay with family germs.  (They will lick their fingers and then put their hands back into the mix to grab some more.)  Germs in a family are going to be spread is my thought process.  Now if I were baking for someone else, I probably wouldn't be so lenient, probably.  :)
4.  Let them taste everything!  Even the raw onion, as Lucca has tried many times and each time he spits it out and asks for "agua".  It helps them to develop their palate and also for the older kid sometimes helps them realize they like something raw but not cooked.  (London for example has decided she really loves mushrooms, but only when raw.)
5.  Have them help get things out AND put away.  Sometimes this means handing them things so they can hand things right back to you.  It makes them feel important and the putting away part teaches them to clean up after making a mess.  Hand them a towel and let them push the flour around on the counter if they think that is cleaning up.  Don't freak, it will be messy!
6.  Don't forget to use teaching moments.  Ask what shape the vegetable is in, ask how things taste, get them to describe what they feel don't tell them how it should taste.  (Ask is it like a cookie? or is it like popcorn? if they don't understand sweet, salty, bitter, sour etc.)  If making bread let them see the yeast rise, it can be exciting when a big bloom shoots up to the surface.  Explain about the water temperature being just right and if you don't know why look it up together.
7.  Be careful with putting them on the counter.  That is my judgement but I can't tell you if it will work for your family.  Sometimes I strap Lucca into his seat on the barstool so that he can work right there, but usually he isn't content without sitting right next to the mixer.  This works for my kids, they both understand "Esperate! No te muevas!"  (Wait, don't move.) when I walk away.  Lucca even does the hand motion I make when I walk away.  Use your judgement with your child and do what you are comfortable with.
8.  Lastly, be careful with hot things and knives.  I never sit Lucca next to the stove and I never let him touch something hot.  London, being almost 6!!!!!, can sometimes pull a chair up and help me stir hot things or add things to a pot.  London can also cut things using a butter knife.  Lucca, NO WAY!  He's way too little.  In fact if I cut things in front of him I do it slowly and always make sure his hand isn't there, because at times he likes to reach for a piece of what I am cutting.  When I am done cutting I place the knife far far away so he doesn't grab it.  (He has tried when it was left a bit too close.)

All those tips are great, but use your own judgment.  Most importantly I think you really need to give up on things looking "perfect".  When kids help, especially with Pizza making, the shape doesn't always come out circular and veggies aren't evenly spaced, as I like, but they feel so rewarded after helping it is worth it.

My Mom always let me help with the butter in the Spanakopita.  It was fun to layer the phyllo dough and slather the melted butter on each piece.  It is such a great memory that each time I make my own spanakopita just the smells takes me back to my home kitchen with my Mom.  Ahhhhh.  So without further ado here is my recipe for Spanakopita.  It was taken from Cooking Light but adapted because it was for triangles and I didn't like how much dill was in it.

Spanakopita

2 boxes frozen spinach, thawed, or 10 ounces fresh
1/3 cup feta cheese, crumbled
1/4 cup cottage cheese, I use 1 or 2 %
2 tbsp parmesan cheese
2tsp olive oil
1 cup green onions, chopped
2 tsp dill
2 tbsp lemon juice
1/4 tsp salt
1/4 tsp pepper
2 egg whites

Phyllo dough, homemade or store bought, thawed (I buy my dough and it here in Boise I know you can get the brand Filo Dough Factory in the frozen section, usually by the puff pastry and rolls.)
butter
olive oil

(I like to prepare the filling in the morning, placed covered in the fridge, and then assemble and bake before dinner.)  If you are using fresh spinach place over medium heat and wilt.  Fresh or frozen thawed spinach press out all the water in a colander in the sink.  You want as much of the liquid out as you can.  Combine the spinach and the cheeses in a bowl.
Heat the olive oil and saute the green onions until wilted.  Add the onions through egg whites into the spinach and cheese mixture.

Try not to let your little helper eat all the cheese.  This might be difficult depending on how much they like Parmesan! 

Melt 1/2 stick of butter with a few tbsp of olive oil in a pan.  Prepare the oven to 350 degrees.  Using a brush, brush the butter and olive oil into your 9x 13 baking pan.  Place one sheet of phyllo dough and fold it to fit, you can always cut the dough but it's easier for me to just fold it to fit and alternating sides that the fold is on. Brush it with the butter mixture.  Place another sheet of phyllo on top.  Repeat the process with 8-10 sheets of phyllo dough.  Place the spinach and cheese mixture and spread.  Place a sheet of phyllo dough on top and do the same process as the bottom layers.  Making sure to brush each sheet and melting more butter and olive oil as needed.  (It's a light version minus the butter!  Ha!)  Do this with about 10 sheets.  *Phyllo dough tends to dry out quickly and it is also very fragile.  When not using leave under a towel and handle with care.

Place into the oven for about 45 minutes.  The top should be golden brown and crunchy and delicious, because of all the butter.

Take out and let cool a bit before serving. Would be great with a greek salad of tomatoes, olives, cucumbers and feta.  Yummy.  It's not quite time for dinner here but I can smell and taste it even though mine isn't even in the oven yet.

Yes, that is a Dora plate I am rocking.  (This was Lucca's serving and he liked it, well half of it.  He's so weird.  London had two servings!)

Namaste!
Natasha

Monday, January 28, 2013

Gnocchi!

London thought this was just the cute name of the cute cat on Curious George until I told her it was actually a little pasta dumpling that we were going to make for dinner.  She found that even cuter.  I agree that the word Gnocchi is adorable, especially when pronounced in an Italian accent.  We have been making a lot of bread lately so the kids, especially Lucca, love getting on the counter with me as soon as they see the mixer come out of the pantry.  This was no exception.  I got this recipe from a cookbook that I bought for someone as a wedding gift.  It was a cookbook about cooking with and for your family.  It was a good idea for them and I hope they get use out of it.  I wrote down a few of the recipes from the book and have been making them and most have turned out really yummy.  This gnocchi was no exception.  I did have to add way more flour than the recipe called for but I think it is because my squash was bigger and I had more puree.  And I added one clove of minced garlic to the brown butter sage sauce.  I might add before you decide last minute to make this for dinner, it takes planning.  You need to refrigerate the dough for a couple hours before making the gnocchi.  I didn't do this so we ended up with Pizza for dinner and had the gnocchi the next night.  It turned out good and I froze half the uncooked gnocchi for later.  Both kids liked it, especially Lucca who ate a lot of it.  Here is the recipe:

From The Family Kitchen

Butternut Squash Gnocchi

1 butternut squash , about 2 pounds
1/4 cup olive oil
salt and pepper
3/4 cup ricotta
3/4 cup parmesan cheese
1 egg
1 1/3 - 1 2/3 cups flour (I used closer to 3 cups!)

Sauce

1 stick or 1/2 cup butter, unsalted is always preferable
1 small bunch of sage leaves chopped
1/2 cup parmesan cheese
salt and pepper
(I added 1 clove garlic minced)

Basically, roast the squash any way you want in the oven at 350 degrees.  (You can slice in half and drizzle with olive oil, salt and pepper or cube it and drizzle and add salt and pepper.  Either way will get the job done.)  When done roasting puree the squash in your food processor and then let cool for a bit.

In your mixer mix the ricotta, egg and parmesan.  Add the squash and then slowly add the flour and 2 teaspoons of salt.  Once the dough has been formed into a soft ball take it out and place in a bowl to cool in the fridge for at least 2 hours.

Take the dough and start pulling off bits and forming the dough into 1/2 inch logs, think play doh and invite the kids to help.   Flour your surface area so the dough doesn't stick.  Cut into 1/2 to 3/4 inch pieces.  (Kids have fun doing this with a butter knife.)  Place the gnocchi onto a plate, not touching for they tend to stick to one another and then you have to start over again, as I learned the first time.

Have a pot of boiling water ready to go.  In batches add the gnocchi into the pot.  They will sink, once they all are floating let cook for an additional 2 minutes.  Scoop out with a slotted spoon and place on a plate.

Once all the gnocchi have finished cooking make the sauce.  Melt the stick of butter in a heavy saucer.  Let it sit until the edges are browned.  Add the sage and stir it up a bit while the butter browns.  (It looks as though tiny pieces are burning and there is all of sudden grit in your pan.  This is normal.  These pieces of 'grit' are the milk fat solids browning and creating a really yummy nutty tasting sauce.)  At the last minute add the garlic and sautee a few more minutes.  Add the gnocchi and gently stir the sauce around the gnocchi.  Add the parmesan cheese and stir again.  Serve with some more parmesan cheese if desired.  Enjoy!

I hope you enjoy this.  I did.  They are dumpling like in consistency so a nice salad goes well.  This was on our menu of vegetarian fare, which we have been sticking with and enjoying!

Namaste!

Sunday, January 6, 2013

New Year New Challenge

It's a new year.  2013.  With new years there are new challenges.  I usually don't set resolutions because I am constantly setting new goals throughout the year but this year I decided I would set a new goal.  Before Lucca's health issues last year we were eating mostly vegetarian dinners.  When I had to go on my strict diet for his health I was forced into a high protein diet.  It took some getting used to but then I settled in and enjoyed.  I am now off that diet and for those wondering Lucca is all better and back in the 50th percentile. (Yippee!!)  My new years goal is to get back into eating vegetarian dinners again.  I figured we would eat meat once a week, and I am going to try to make that a fish, but this realistically gives us an excuse should the occasion arise.  We have now gone one week and we have done good.  (For those skeptics out there Patrick is fully on board.  I have a stamp of approval from him!)  I am going to use this as an opportunity to challenge you readers to change a habit.  It takes 21 days to make a habit.  (Most people with the new year resolve to go work out.  Do it for 21 days straight at the same time every day and you will most likely keep it up for a long time.)  So my goal is 30 days, all month, and hopefully it will continue throughout the year.  (My only problem is creativity.  I am checking out many books from the library and trying new things so if you have a favorite vegetarian recipe please share!)  Here is my first post from the vegetarian challenge.

Coconut, Ginger Curry Vegetables over Coconut Rice

1 clove garlic
1/2 onion
2 inch cube of fresh ginger
1 tablespoon olive oil
2 cans coconut milk, NOT shaken
1 can corn cobs
Vegetables of your choice
1 1/2 teaspoon green curry paste

Spice Blend
1/2 teaspoon ground pepper
1 teaspoon cumin
1/2 teaspoon garam masala
1 1/2 teaspoons tumeric
1 teaspoon salt

Coconut Rice

1 tablespoon coconut oil
1 1/2 cups rice
3 cups water

In a food processor combine garlic, onion and ginger.  Grind until a paste is formed.  Combine the spice blend.  Heat olive oil in pot.  Add aromatic blend of onion, ginger and garlic.  Stir for 2 minutes and then add the spice blend and green curry paste.  Mix and stir for a few minutes to heat up spices and activate them.  Add the drained corn cobs, whole or chopped.  Open the cans of coconut milk and scoop out the cream from the top.  Place the cream in a bowl and place to the side.  Add the milk and the vegetables of your choice.  ( I love using bell peppers, peas, broccoli and mushrooms.)  Then mix the coconut cream, remember to set aside 1/2 cup for the rice, with one cup water.  Mix to combine and then add to pot.   Let simmer.

Rice -

Heat the coconut oil in a pot.  Add the rice and stir to coat the rice.  Add two cups of water.  Take 1/2 of the coconut cream and mix with one cup of water and add to rice.  Simmer until cooked thoroughly.

Serve the curry over the rice and enjoy!

Here is to a healthier year and a regular blog post!  (I am really going to try!!)

Namaste
Natasha


Tuesday, August 14, 2012

Perfect Summer Side

I like to plant my vegetable garden from seeds.  It's less expensive and so much more fun.  London helps me dig the holes and then places the seeds in.  We check and check and check in the next couple weeks until we see green poking up out of the dirt.  The one thing I buy started are tomatoes.  I don't have a good spot in my house to start them indoors and I've never had success starting them outdoors by seeds.   (The never get big enough to get tomatoes on them when I do.)  I will keep trying though.  We like to buy our plant from the Farmer's Market in Boise.  We also like to buy the Early Girl variety. We have had great success with this type and like today we are always drowning in fresh tomatoes come end of July.  Right now at this moment after making a delicious side of tomato salad I still have 10 on my counter looking juicy red.  I like to the extras whole or can them diced.  I wait until towards the end of the summer to do that because right now I am still loving eating tomatoes every day.  Nothing tastes better than a warm fresh picked garden tomato.  Yum yum.  We have been having sliced tomatoes with olive oil and balsamic on them almost every night.  I also have basil that is doing really well this year.  Here is my summer time Tomato Salad recipe:

Tomatoes, how many you use is up to how many you are feeding and how much they like tomatoes.
Big Bunch of Basil
Fresh Chives
Clove of garlic
salt and pepper
Extra Virgin Olive Oil
Balsamic Vinegar


Chop up the tomatoes and place in a bowl.  I didn't dice them but chopped them so they would be larger chunks.  Don't forget to add the juice from the chopping board, it adds lots of tomato flavor.  Chop up the basil and chives and add to bowl.  (I used about 8 chives from the garden but how many you use depends on how big of a serving you are making.)  Dice up the clove, or slice it really thin, and add it to the bowl.  Sprinkle salt and pepper.  Drizzle the oil and vinegar over top of the ingredients.  Stir to combine.  Let marinate for a couple hours to intensify the flavor.  I had mine marinate from 3 until 6 pm and it worked fabulously.  


Super easy and super tasty.  Happy Tomato Eating!

Namaste,

Natasha

Tuesday, July 24, 2012

Oatmeal Muffins


I am on a muffin kick. Well for the last two days I have been. There is a local natural food market that I go to once in a while that sells bags of bananas for .99 cents. They are overripe and browning. Perfect for banana bread or muffins in my case. So yesterday I made banana oatmeal muffins. I followed my banana bread recipe except I subbed the egg with flax and threw in 1/2 cup of oats. Yummy! They were gone yesterday. I know! I made them yesterday!

Today Lucca has been having poop issues, too many bananas most likely. :/. So I figured blueberry muffins would counter that. :). I made oatmeal muffins, half with blueberry and half without. They just came out of the oven and we are two down. Better save at least one for daddy!

1 1/2 cups flour
1 cup rolled oats
1 tsp baking powder
1/2 cup brown cane sugar
1/2 tsp salt
1/2 tsp cinnamon
1/4 tsp nutmeg
1/4 tsp baking soda
1 egg (or in my case I used flax. 1 tbsp flax meal mixed with 3 tbsp water and set aside. Do this before anything else so that it has time to set up. )
1 cup plain yogurt
1/4 cup melted unsalted butter
1/4 - 1/2 cup milk

Preheat oven to 400 and get your muffin tin ready Mix all dry ingredients. Mix all wet ingredients except milk. Mix together. If batter is as thick as mine was add the milk a little at a time Add blueberries if you would like, gently. :). Place in tins and bake for 18-20 minutes. Take out and enjoy.

The great thing about replacing egg with flax is that you can lick without feeling worried about getting sick. It also adds extra fiber. :). Which my little one really needs right now.

Namaste
Natasha

So safe that I let both kids lick the bowl clean!  

Sunday, July 22, 2012

Summer Sides

Today I went out into my garden and picked a large yellow zucchini squash and a handful of peas. Yesterday I went to the farmers market and bought a bag of skinny green beans and a red onion.

Here is my recipe:

Pad of unsalted butter
Two handfuls of Green beans
Handful of Peas
Clove of garlic
Thin slices of onion
Salt and pepper

Boil a pot of water. Submerge beans, peas, and squash for three minutes. Scoop out and submerge in ice water. Empty hot water and melt the butter. Add the onion and saute until soft. Add the veggies and salt and pepper to taste. I like to grate the garlic over the pot and add the 'zest'. Sauté.
Enjoy.

Namaste
Natasha

Friday, July 13, 2012

Dinner in China

Dinner was really good in China tonight. We have a friend who lives 30 minutes away and says we live in China. I guess Patrick invited him to dinner and he turned us down because we live "in China". Well let me tell you it was really good "Chinese" food. You missed out Max! :) There is always next time.

I made Portobello summer squash lasagna. I found the recipe on pinterest. You can find it here. I didn't put as much cheese. In fact I put probably half the cheese. The recipe called for a layer of mozzarella and Parmesan for each layer. I only did that on the top. I also half baked it around 3 pm. Then finished it before dinner. It worked great and was super yummy and best of all vegetarian!!! I love cooking vegetarian meals. They just don't have that heavy feel to them after you finish. This is a really bad picture of it because I only decided to take a picture last minute once the dish was already cold. :/. Sorry.


Anyhow, just an update on my dinner. What did you eat tonight? :)


Side note: my garden is doing awesome even for starting so late. Here are some pictures of my tomato plant, pepper plants, corn and yellow squash. Tomato salads are days away.


Namaste
Natasha

Wednesday, July 11, 2012

107 degrees

Okay. The other day it reached 107 degrees. HOT. It hasn't been that hot in Idaho on that date for 20 years, or so they said on the news. It has been over 100 for the last 5 days. It is a dry heat so more tolerable than humid heat, at least for me. We have been hot and wishing we had a pool. An in ground nice pool. For now our blow up pool will have to do. I still don't get in but London loves it. Pure torture is when I have to sit in the sun and watch while London swims in a nice in ground pool during lessons at the hottest time of the day, 4:30. Bleh. It is then that I have little pools of sweat accumulating in those little spots on my body. Oh and nice arm pit sweat too. Pure torture! As so many people I know are into watermelon right now, we are too. It is the time of year when mass quantities of watermelon are sold. We were going to grow watermelon this year but got a late start. On a side note, I picked my first red tomato yesterday! Super stoked about that and the millions more to come. Back to watermelon. I like to make it into a drink but this time I decided to cut some up and to freeze some on Popsicle sticks. If you know me, you know my obsession with Popsicles. It has passed on to London and her friends that come to play. I get into so much trouble if I don't have any made. So I sliced some melon and placed sticks into them. Placed them on baking sheets lined with wax paper and stuck them in the freezer.


Watermelon before freezing


So easy peasy. No molds or pureeing. Girls came over, melon was frozen and they were stoked! Lucca was too. Then they jumped in the blow up pool. In a while it's time for torture mom time but for now I'll stick my feet in and cool off.


Lucca loved it too!
London enjoying her melon.

Namaste!
Natasha

Sunday, July 1, 2012

Dehydrating

Some days I don't drink enough water and I feel dehydrated.  No silly, that's not what this post is about!  It's about playing with my friend Kerry's dehydrator, and fruit of course!  I know I said I wasn't going to go on about cherries anymore but I still had some in the fridge and I had to do something before they went bad.  I even made more pop tarts.  My neighbor and friend Kerry mentioned that she had a dehydrator in her pantry.  I asked her if I could play with it and she so nicely said yes.  I have had a dehydrator on my wish list of some time now, at least 2 years.  I've researched them and forgot and researched them and forgot and the cycle goes on.

Fast forward to yesterday and I got the dehydrator from my friend and started to use it.  I got to work pitting the rest of the cherries.  After I pitted the cherries I pureed some raspberries, that I picked, strawberries that I bought and cherries that I, well you know the answer to that.  I also wanted to try my hand at fruit leather.  I looked up how long to dehydrate for and the answers varied tremendously.  One site even said 90-100 hours for dehydrating cherries!!  That's a LONG time!  Someone else's blog said 8 hours.  So I figured I would wait until morning and see how long it took.  That way they wouldn't finish in the night and then keep going until morning and I wouldn't wake to ashes.  :/  That wouldn't be very tasty.  Well I put the puree on the special mats and I think I will need to try my hand at leather another time.  This batch didn't turn out well.  Some of it did.  I didn't make sure it was all even thickness.  So some parts of the leather were too dry and others too moist.  I couldn't peel half of it off and some was still mushy.  I did get some and the strips that I did get off were tasty.  In the future I will try it again so that I can get good at it.  Maybe when I get my own machine?  (I hope my husband is reading this although he already bought my birthday present.  Maybe anniversary? hint hint)  Did I mention I love him?  A lot?  :)

The berries before puree.  


The fruit leather dehydrating.  (I did get a picture of the actual leather but on my other camera.  It's getting late, so they will have to wait.)


This morning I halved the pitted cherries and placed them skin side down on the trays.  I turned on the machine and let it go and looked at the clock, 8:30 am.  At around 5 pm was when I finally liked the texture of some of the cherries.  Some where done and others needed more time. I took the ones that were done out and let the others keep going.  I think they are finally all done, it's 9:00 at night now.  So I'd say anywhere from 8-12 hours for all my cherries.  (Some were fatter than others.)  Now, I have not too many but some delicious dried sweet cherries.  I am going to put these into my granola bars right away.  If I have more left over I think we will just eat them as snacks.  Maybe if I have my dehydrator by next cherry season, ahem!, I will be able to dehydrate a bunch more and then we will make them last and I will figure out the best way for us to store dried cherries.  For now, I'll just gobble them up and I bet both kids and the husband will help.  (I'll be out by tomorrow night!)


The pitted cherries before dehydration.
During dehydration.
Finished product in a bowl 1/4 the size of the original blue bowl.  Yummy!


Namaste!

Monday, June 18, 2012

Cherry Mania


By now I am sure you have all had it with my cherry posts.  If not, read on!  Now that I have my true loyal readers I will let you know what I've been up to with my twelve pounds of cherries.  First I made the crisp.  Then for Father's Day, except we celebrated Saturday, I made Patrick ribs.  I never make ribs but I made them and not only did I make them but I made cherry BBQ sauce.  Well I cheated and didn't make the sauce from scratch but I bought my favorite no high fructose corn syrup sauce and added pureed cherries into it.  Basted the ribs over and over again.  They were pretty good.  Then Sunday I made jam.  I like to make my own jam whenever possible.  A few reasons for this is high fructose corn syrup.  As most of you know, HFCS is in everything now.  It is very hard to find jams, preserves and jellies made with sugar.  Even the sugar free kind is made with aspartame, even worse!!  I find some good jams at Cost Plus World Market and also at this barn that sells fresher produce and during the summer local produce.  If given the chance though I like to make my own.  Not only do I make sure it is cane sugar in my jam but I dictate how much, which is usually less than other people use.  So I made some jam.  I didn't can it though because I was just going to use it for my pop tarts.  Which I made today!

I love pop tarts, but hate how horrible the store bought kind are for your health as you might remember, I blogged about it a couple years back.  I even gave you a recipe for them that I got off of Smitten Kitchen's blog.  I made some chocolate ones.  Well this time I made cherry pop tarts.  Not only did I make cherry pop tarts that were so so so so good but they are soy, dairy and egg free!  (I am amazing!)  ;)  If you have been following me I was on a very restrictive diet for the baby and am now able to eat anything.  However, I still am trying to avoid most dairy and like to substitute to make things healthier even more than I did before.  Today I decided to play around with an already fabulous recipe and try to change it.  Here is my new recipe.

Soy, Dairy and Egg Free Pop Tarts

Jam Filling:
3/4 cup jam
1 tablespoon cornstarch plus 1 tablespoon cold water mixed (TIP: cornstarch and flour mix better with cold water as opposed to hot.)

Put both jam and cornstarch water mixture into pot over medium heat.  Bring to boil and let simmer for a few minutes stirring until thickened.  Turn off heat and let cool.

The jam with the cornstarch before mixing.

Dough:

2 cups flour
1 tbsp sugar
1 tsp salt
1 cup Earth's Balance soy free butter substitute (Butter if you don't care about being soy/dairy free)
1 tbsp ground flax seed mixed with three tablespoons water
2 tablespoons dairy free milk (I used vanilla almond milk)

In a small bowl mix the ground flax seed meal with the 3 tbsp water and let sit.
In a mixing bowl combine flour, sugar and salt.  Add butter substitute or butter cut into small pats.  Mush with hands until dough is crumbly but sticks together when squeezed.  Now add the flax seed meal and milk.  Mix together with a wooden spoon.  If your kitchen is warm place the dough in plastic wrap into the fridge to cool it off.

When ready roll out dough and cut into desired shapes.  I used a small Ikea bowl to make the shape I wanted.  You could do circles or rectangles too.  Place one cut shape onto your lightly greased baking sheet.  Because I was doing egg free, using my finger I dabbed a bit of water all around on the edge of the dough.  Place a dollop or two of jam in the middle.  Place another piece of dough on top and seal the edges together.  Using a fork, poke some holes onto the top to let the steam rise out while baking.  You can crease your edges or not.


Place in fridge and preheat your oven to 350 degrees.  Once preheated take the pop tarts out and bake for 20 -25 minutes.  Take out and PLEASE wait to bite into one.  It will be soooooo tempting to just take a big bite, but then your mouth will be on fire and you will end up either burning your esophagus, because you swallowed so fast, or spitting out a perfectly good piece of pop tart.  So wait, and then you can enjoy the entire tart.


London, Lucca and I were on our way out the door but had to wait for these babies to get out of the oven.  I grabbed a quick picture of the pop tart finished, super duper hot and on a paper plate in my car.  It's not the most elegant picture of the finished product but if only you could taste through picture you wouldn't care.  :)


London and I enjoyed these and we agreed they tasted like personal cherry pies.  So yummy.  And remember if you only want to bake a few you can freeze the rest, pre-made but not baked, in between wax paper and in a plastic bag.  Then when you want one or two you can take them out of the freezer and place into the oven to bake.  Or bake them all, place them on a plate and watch them disappear faster than it takes you to wash all the dishes and clean the counters off.  Freeze them, they'll last longer.  :)

(Off the topic of pop tarts, tonight for dinner I made pork chops.  I used a red wine as the liquid and some cut up cherries and it came out divine.  One of the many uses for cherries.)

I think I am done blogging about cherries.  What will my next topic be about?  Stay tuned!

Namaste
Natasha

Friday, June 15, 2012

Cherry Rhubarb Crisp

First of all we had to take a trip to Target to buy a cherry pitter.  I saw ways I could do it without this handy device but I figured I would spend the $12. on a pitter that got good reviews, OXO brand, since I have so many cherries to pit.  This is the coolest device!  I love a good kitchen gadget and this one works like a charm.  London and I had fun pitting some cherries just to eat this afternoon.  She thought the pitter was "awesome".

For my first cherry recipe I followed a recipe I found on twopeasandtheirpod.com.  I followed it almost exactly except I added vanilla to both the crumble topping and the cherry rhubarb filling.  I can tell you this, the topping is excellent but the filling was too tart for my liking.  (I ate my serving anyways, all of it.)  If I were to make this combination again I would add sugar to the filling.  But I think in a few days I will try a crisp again but only cherry.


The cherry pitter in action.  The only sad part is that it pops out a tiny bit of cherry on the other end that had I put that cherry in my mouth would end up in my tummy instead of the pit jar.  : /


The pit jar, with tiny bits of good yummy cherry in it.

The pitted cherries


Chopped up cherries!

3 cups chopped cherries
2 cups chopped rhubarb
1 tbsp cornstarch
1 tsp vanilla
2 tbsp flour
1 cup old fashioned rolled oats
1/4 tsp cinnamon
1/4 tsp salt
4 tbsp unsalted butter cut into small bits
1 tbsp honey
1/2 tsp vanilla

Pre-heat oven to 375.  Prepare an 8 x 8 pan or similar sized pan.  In one bowl mix cherries, rhubarb, cornstarch and vanilla.  Set aside.  In a new bowl combine oats, flour, cinnamon and salt.  Add butter bits and mix by hand until crumbly.  Then add honey and vanilla.   Stir with a wooden spoon.  Pour cherry mixture into pan and then top with oat topping.  Place in oven for about 30 minutes.  Until the top is golden and the cherry rhubarb filling is bubbly red.  :)  Eat warm plain or with ice cream.  We ate it plain.

Finished crisp.  

Like I said before, for me it was tart but London ate it up and said it wasn't tart but perfect.  She can be sweet at times.  Oh and my baby boy is the best!  He is an avid reader at 13 months and will drop any tantrum if you offer him a book.  I'm serious.  So I wanted to bake.  I plopped him down in front of his book collection and kept checking back only to find him in the same position.  Love this baby!


Tomorrow I will make another cherry recipe.  I think it will be another sweet one but I am thinking on Monday we will try a savory cherry recipe.  Hmmmm, did I mention that a few weeks ago I won 10 pounds of organic pork?  Stay tuned!


Namaste!

Thursday, June 14, 2012

It's Raining Cherries!

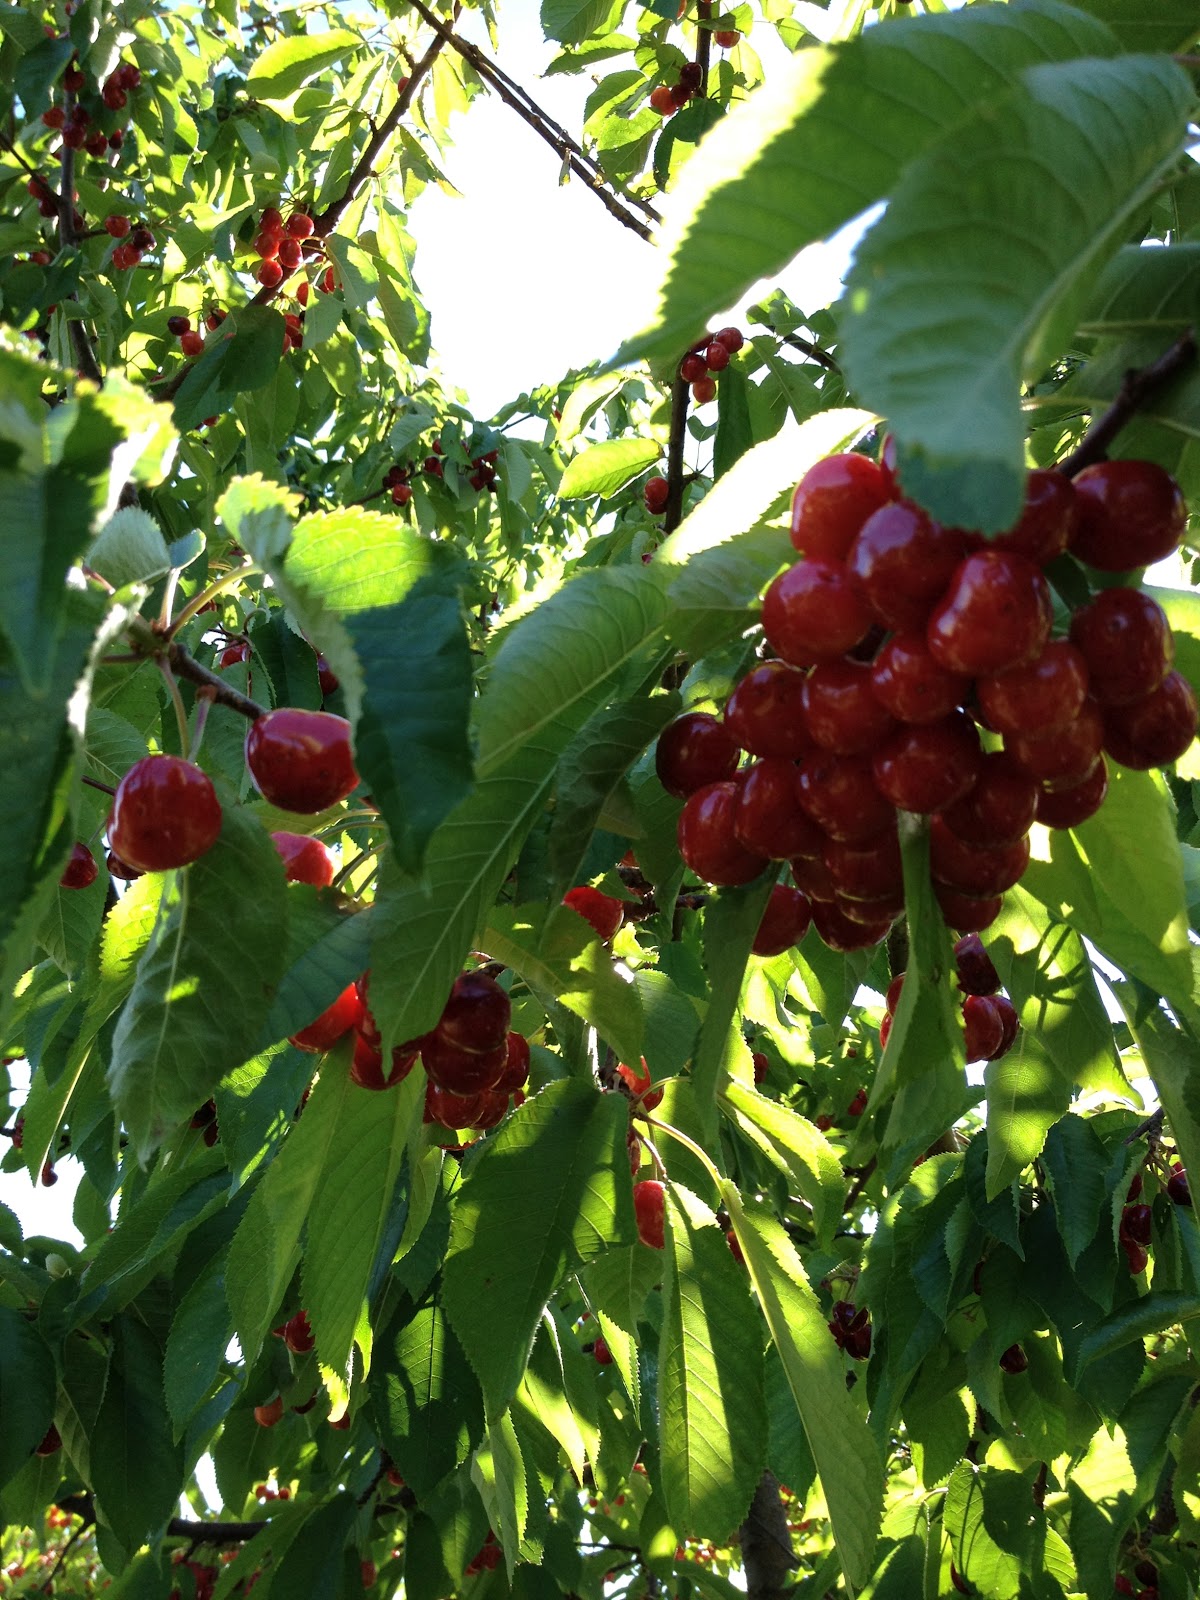
I am so so lucky to live in Idaho.  (I never in a million years would have thought that statement would have come out of my mouth but it just did.)  When my parents moved to St. Croix in the USVI my Dad told me that in his mind he was going to give it 5 years.  If after that they didn't like it they would move.  At 5 years he liked it and didn't hate it so they decided to give it 5 more years.  After those 10 years he said he was stuck.  He loved it so much he never wanted to move away.  When Patrick and I moved to Idaho he gave me that advice, give it 5 years.  Well we are now on 6 and I would have to say that at year 5 something magical happened.  I realized that I had made friends, discovered places that I love to eat and frequent, we had two children that have friends, well the older one does at least, and I have decided I really like Idaho.  :/  (Still can't believe that is coming out of my mouth!  I'm freaking out a bit as I write this, really!)  Anyways aside from the freak out going on right now, I do, I really like it here.  Part of this is because I've moved to Eagle and into an awesome neighborhood.  We always lived in West Boise.  I liked it okay.  Actually I was pretty miserable.  I was begging Patrick to let us move, hoping he would want to move to an island that has a lot of mosquitos that leave me alone and bite the hell out of him.  At one point he was seriously considering it.  He even interviewed at some jobs and was offered one.  But life changed in a big way and we decided to stay put.  We moved to Eagle and magic happened.  I love it here.  A simple change in scenery and I was hooked.  Eagle is close enough to downtown Boise but far enough away to feel more country.  The downtown is quaint and the library only 10 minutes away by bike.  The neighborhood has lakes and ducks and geese, there is even a resident beaver that they are trying to get rid of but we've been lucky enough to spot it.  London can fish in the lakes, catch and release and we can bike to our hearts content, which is never enough for Lucca.  Even better is that Emmett, Idaho is only 25 minutes away.  What is in Emmett you may ask?  Orchards of course!

Tyler's Rocky Point Orchard in Emmett Idaho
Cherries, Apricots, Apples and Plums
(We will be going back for Apricots.)
Cherries are in season.  In fact the orchard just opened on Wednesday for u-pick cherries.  I couldn't pass up the opportunity to pay $1.05 per pound for cherries.  (At the store they range from $2.98 - $4.98 per pound.  I know because I bought some two weeks ago and almost fell to the floor when I saw the total.)  So I got London super excited and used the opportunity to re-teach pollination to her.  This helps her to also understand why we should be kind to bees seeing that they help our garden grow.  (Wasps are another story.)  Off we went, leaving the house at 9:30 am to beat the heat and pick some cherries!

A few hours and a picnic later, we were done.  We took our time, Lucca strapped to my back made the picking slow and we both had to stick to the lower branches which was actually just fine for us.  As is the case with most children, London ate more that she picked, well maybe it was a draw.  Either way she had a blast, I had a blast and Lucca enjoyed my back.  No he liked it.   We played peek a boo and stuff like that.

The Cherries were pulling the branches down so far that some were touching the ground.  Easy picking for a 5 year old.

London picking, she either put it in the cup "for Daddy" or ate it.  Not sure which but both are probable.


Trying to get a portrait of Lucca on my back by myself is hard.  London was too busy eating, I mean picking, to help.  (Where did her helping spirit go?!)


At this moment in my extra fridge in the garage, which we were just about to unplug since we've gone through all our organic beef, is twelve, 12!, pounds of cherries.  I guess we picked enough.  I'm not sure yet if we picked enough but I will soon find out.  Tomorrow I am going to buy a cherry pitter and get to work.  What is in the works?  Well you will have to tune in to find out.  I promise I will post more.  I have some things planned and guess what they involve?  You guessed it!  Cherries!!

The cherries in my fridge right now.  (Or course this is not all 12 pounds but a close up so you could be jealous of me being able to grab a handful and eat them if I wanted to, which I do and will when I am done with this blog.  Now.)


Namaste!

Wednesday, February 8, 2012

Salsa Verde


We have been having a great few weeks here at the Palmer home. Lucca is gaining weight! We are so happy it's contagious. He is barely spitting up as well. Can you say miracle?! He is still spitting but the change is huge. (He went to the store the other day with no bib on and didn't spit up the entire time!)

I am still on my restrictive diet but have come to embrace it, except when I don't feel like cooking and we go out to eat. Most restaurants have few options that I can actually eat and we've even gone somewhere before counting on them having gluten free corn tortillas just to find out they were out. This was after the other food was ordered and being made. I got to come home and eat cereal after watching my family eat super yummy food. That is the extreme though and for the most part I am loving this diet. I feel like I have more energy. I am not hungry between meals and for that reason I am not snacking. I have lost all the baby weight plus some. This has me feeling fabulous!

For the last month I've been trying to perfect my Salsa Verde. I think tomatillos are in season somewhere because there are big boxes of them at my grocery store.


I think I've done it, for now at least. Here is my Salsa Verde recipe, with little to no quantities since I really don't like measuring:

a bunch of tomatillos - try and pick them up individually. It takes more time but if you just grab a bunch you will end up with some moldy ones or some that are almost bad.
one small onion
one clove of garlic
one jalapeno
salt

Preheat your broiler in your oven.
Line a baking tray with foil, for easy cleanup.
Peal the husk off of the tomatillo and cut in half.
Place the tomatillo skin side up on the baking tray.
Dice your onion and place on tray along with the clove of garlic.
Quarter the jalapeno and take out the seeds and veins. (Be very careful to not get the juice in your eye and to wash your hands immediately after or to wear gloves.)Place the pepper on the tray skin side up.

Place the tray in the oven and check back until the tomatillos are browning on the top. I left mind until they were pretty brown on top. (Your kitchen will smell delicious!) I don't know how long this took because I forgot to look at the clock but just keep checking. Remember, with broiling food can burn very quickly so if it looks almost done, don't walk away, stay put and check often.


Take out of the oven and let cool for a few minutes. Now you can blend the ingredients together. (I only used 1/4 of the jalapeno since I am nursing a baby, I have a 4 year old that was going to eat this salsa and my husband is not Mexican.) I used my immersion blender and it worked wonderfully but you could use a regular blender or a food processor to get the job done. Blend until the consistency that you desire.

Now taste and then add salt if you need it. Remember that it is going on food that you might have already salted so don't add too much.

Last night I made my salsa to use on my enchiladas but the last time I made this salsa I used it on pork chops. The nice thing is that you get leftovers to use as dip for chips. YUMMY!


I hope you enjoy this as much as I do!

Namaste!


Monday, January 2, 2012

It's Baby Food Making Time!


Well the little one is now 8 months old. It is a new year and I have yet to blog consistently. I will again soon, promise. :) Right now we are concentrating all our efforts on helping Lucca gain weight and grow. He still is spitting up a whole lot but thankfully he is gaining. Slowly I might add, but any gain is good gain in my opinion. Part of helping him to gain weight was to let go of a goal of mine. I originally wanted to breastfeed exclusively until the little guy was 6 months or even 7. I almost made that goal until he decided to not gain any weight for two weeks. Not a single ounce! So I made the decision a week before his 6 month date to start him on solids and to not take my time with them.

Like most women, I had ideas of what I was going to do with my babies before I even had them. One of those things was to breastfeed. My Mom breastfed both my sister and me, and my sister breastfed her daughter, and now son, before I had my first. I never thought any different, I knew I would breastfeed my daughter the minute I found out I was pregnant. Another thing I knew I would do with my babies was to make their baby food. Again both the prominent women in my life did it so I figured it was normal and just what I was going to do. My Mom used to tell us how she would take along a food mill to restaurants or wherever and just grind us our food right then and there. (No wonder both of us love food and were never really picky eaters.) My sister made her daughters food using a great book which she then passed on to me. I've mentioned it before, it's by Ruth Yaron and called The Super Baby Food Diet, or something along those lines. So when I decided to start Lucca on solids I knew just what I was going to do. Start making food!

Making baby food is one of the easiest things you can do in the kitchen. It is also one of the most rewarding things you can do in the kitchen. Watching your baby eat fresh, not canned, food that you prepared with love is a great feeling. This mini blog isn't really a cooking recipe or anything like that. Just a little information on how you can easily make your own baby food. The first food, and a staple that he has every night, was avocado. You heard me right! It is one of the best foods for babies. It has so many healthy fats that help babies brains grow smart, and help babies that are trying to gain weight to put on some ounces. :) Seriously, he eats it every single night, HALF an avocado!! (Patrick and I constantly tell each other that if he didn't spit up so much, he would be a sumo wrestler. He loves his food!) With avocado, just buy a ripe one and mash it with a fork. Add breastmilk or water to make it not so thick and voila! Baby food!!

For most foods you would steam the vegetable until soft and then puree in the blender. Adding the steaming liquid to thin it out. After I puree the vegetable or fruit I then place into ice cube trays and freeze. Once frozen I pop out the cubes of food into a labeled freezer bag and there you go. Individual cubes of food. Depending on age and likes they can eat just one cube or two or more. Most of the time Lucca eats two, I tell you he would be fat if we could just put a plug in him!! (I wish it were that simple, I really really do.)

Here is a picture of my freezer today. (Not in order, Squash, Papaya, Prunes, Pears, Apples, Green Beans, Carrots and Sweet Potatoes.) He's got some fresh spinach in the fridge too. Yummy. What baby would love to taste fresh homemade foods!!


NEVER add sweetener, not even fruit juice. NEVER add salt or spices. Let your baby taste it for what it is. Their tongue doesn't need to be trained to need sweets or salt. Let them try it the way it is supposed to be tasted.

NEVER assume baby doesn't like it. ALWAYS keep trying. One bit of advice my Mom gave us is to never say anything negative about food in front of a baby or little one. (For example if you don't like green beans don't offer that information up, just smile and tell your little one how yummy it is. And force yourself to eat a bit of it too, it whole form.) This advice has been great! I think it's the best thing you can do for your kids. Give them no judgement but their own. Let them decide what they like or don't like. But remember, just because they might not want it one night doesn't mean they won't like it or want it the next.

On another note, I got to participate in the Target Nurse-In!! (This is where breastfeeding moms get to band together and go nurse in public at a location that was not tolerant or kind to a fellow breastfeeding mom.) I have wanted to participate in a nurse-in since London was born but have never had the opportunity. I ended up being the only one at my location but let me tell you how great it felt to know that I, along with thousands of other moms, were at Target last Wednesday nursing our babies to send a message. Nursing in Public is perfectly acceptable with or with out a cover! I have nursed both my babies everywhere and have never thought twice about it. (I thank my sister for that courage. She knows what I'm talking about. I used to be uneducated on that topic but she set me straight!) I took along London and she got to learn how important the topic is just by seeing Mommy stand up for what she believes in. She even took this picture of me.


What a great little girl. (So great in fact, that today she nursed the doll at the Chiropractors office while we were waiting for our turn. Lifted up her shirt, found her nipple and placed that doll on! YEAH for nursing in public!)


Namaste,
Natasha